of the
Dear Tipsters,
How can I create and close a task in one step on mobile, similar to the create and mark complete process in Dynamics 365 in browser experience?
Signed Taskmaster
Taskmaster:
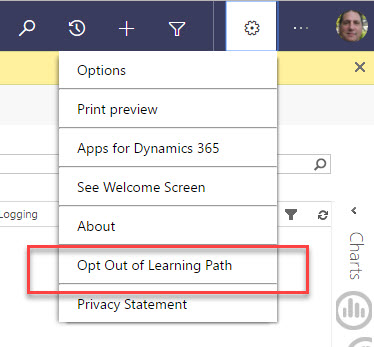
- In the Dynamics 365 mobile app, create a task.
- From the edit form, click the options (…) button in the lower right corner.
- Click close task.
Alternative approach: create a task flow process to create the task and have the task flow trigger a workflow to close the task, giving you a quick “create and close task” button on mobile.