Tip #862: Mobile offline profile decision matrix

When deploying Dynamics 365 mobile with offline capabilities, it is important to plan your profiles. Profiles define what data should be available when offline.

I use a simple planning matrix to define the filter options for each business group that will be used offline. This spreadsheet includes the standard filter options:

  • All Records
  • Related Data
  • My Records
  • My Team’s Records
  • My Business Unit’s Records

Use the spreadsheet to plan the profiles, then create the profiles in Dynamics 365 and assign users to the profile.

Some rules of thumb to keep in mind:

  • Offline profiles complement security roles–I can’t take any data offline for which my security roles do not give me access. So if a user’s roles limit her to only accounts that she owns, you can set her offline profile to “all records,” and only the records she owns will go offline.
  • Activities and notes should typically be set to “related data.” It doesn’t make sense to get notes for records that you won’t have offline (since you won’t see those notes).
  • If two or more groups have the same offline requirements, don’t create multiple profiles for these groups. For example, if sales reps have access to only accounts that they own, and sales managers have access to a broader set of accounts, the same profile may work for both groups.
  • Test and tweak: Once you have planned your profiles, create the profiles and test with a realistic sample user in each profile. Test the performance, sync time, and storage used on the device, and based on the testing, tweak your profile filters accordingly.

Download the Dynamics 365 Offline Profile Decision Matrix. Note this is just a sample–you will want to add your desired profiles and ensure that all entities you will be using offline are included.

Tip #861: Dynamically Filtering CRM data into PowerBI

PowerBI PrefilterThere are a number of ideas around how to pre-filter PowerBI visualizations to explore CRM data – but there’s not a clear replacement for in-line charts on forms, just yet.

But don’t despair, celebrated CRM chart blogger, Ulrik “CRM Chart Guy” Carlsson recently joined Scott “Captain Redlaces” Sewell  and Joel “Just Joel” Lindstrom on the CRM.audio PowerBI podcast and discussed some of the ins and outs of combining CRM and PowerBI – (and cleared up some misconceptions about the use of ‘Embedded PowerBI’ in the process.)

Ulrik posted a cool tip on how to add a hyperlink link from CRM to a pre-filtered PowerBI report. – This tip gives you, in a one-click-away method, a dynamically pre-filtered PowerBI report, filtered to the record in CRM you’re currently viewing. Examples might be to build a ‘Customer Overview’ dashboard that shows various charts and visualizations of CRM, combined with non-CRM, data for a specific customer. – Or a Salesperson Dashboard that links from a CRM user record to a mashup in PowerBI of all kinds of interesting visualizations.

It’s a great start to take advantage of PowerBI’s visuals and ability to combine CRM and Non CRM data.

Take a look at Ulrich’s blog post here for the full instructions:https://crmchartguy.wordpress.com/2017/03/30/record-specific-power-bi-reports-in-dynamics-365-only-one-click-away/

Here’s a great video related to structuring your PowerBI report for use with a dynamic filter via a URL: https://www.youtube.com/watch?v=EXObcA9G9Vw


Tip #860: When export to Excel fails for no reason

Dynamics 365 is a temperamental mistress – everything is fine until it is not. Export to Excel has been working for a customer like a clockwork but then one day, without any warning, attempts to export this view:

Export records

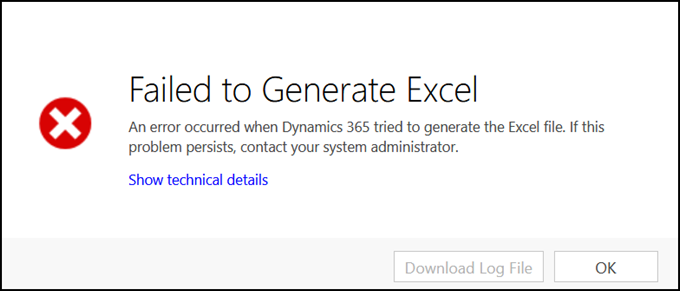
started to generate this error:

Failed to generate Excel

(Clicking Show technical details would give some useless generic error with the invitation to contact system administrator a.k.a me)

Let me show the first screen again:

Export records with issue highlighted

See?

While column names must be unique in Dynamics 365, nothing prevents customizer from creating two fields with the same Display Name. Everything seems to work fine but export to Excel dislikes duplicate column titles very much. Making the display name unique (per view basis at least) tamed the beast.

Tip #859: Error when starting mobile app

As promised in tip 850, I am reviewing the reviewers of the Dynamics 365 mobile app. For today’s tip, let’s look at this review from SRDK05:

mobileerror

SRDK05 has negative feelings toward the app because it gives him or her an error message at step 3 of the setup process. When this happens, the first step is to identify what the error message is. Sometimes the error messages are generic (“an error has occurred”), so it is important that you know how to turn on trace logs in the mobile app. These logs will give you more detail, and frequently will help identify the real error message. SRDK05 would have known this had he or she read tip 5 back in 2013. Once SRDK05 had the error message, he or she could search Google or Bing for the error message, and hopefully find the solution.

The most common cause of error messages during the mobile app configuration sequence is missing security permissions. Especially if you have upgraded from CRM 2011 and use custom security roles, these roles may be missing some of the permissions that are required to use the mobile app. SRDK05 can find out what those common missing permissions are by reading tip 4.

Once you check out your security permissions and verify that you have the appropriate permissions, check some other issues that may be causing errors during the app initialization sequence:

  • Poor internet connection
  • On premises CRM deployment without IFD
  • Corrupt XML in the sitemap
  • Not enough space on the device
  • Repointing the app multiple times between multiple environments can sometimes result in errors–try a clean installation of the app

If possible, test with another device to eliminate device specific issues. If all else fails, open a Microsoft support ticket.

Summary:

  1. Turn on tracing and get the real error message
  2. Search Google/Bing for the error message
  3. Check user security permissions
  4. Try with another device
  5. Open a Microsoft support ticket

Tip #858: So you messed up your sitemap

Have you ever tried editing your CRM sitemap, only to find that you somehow messed it up to the point where you can’t get in the application because the sitemap can’t be rendered? How do you get in to fix it?

What I recommend is:

  1.  Get a solution with a clean sitemap, either from an older version of your solution or set up a trial and create a solution that only includes the sitemap.
  2. Go directly to the solution import URLhttps://yourorgname.crm.dynamics.com/tools/solution/import/SolutionImportWizard.aspx
  3. Import the solution

Alternatively, try to connect with the XRM toolbox sitemap editor and you may be able to remove the offending area and/or reset the sitemap to default.

Tip #857: Missing component id {0} error when publishing customizations

Today’s tip comes from Daryl “Always Raising” LaBar. (And you can submit your tips too by emailing them to jar@crmtipoftheday.com.)

I recently had the issue described here when publishing customizations. It results in the error message “There was an error calculating dependencies for this component. Missing component id {0}.”

In case anyone hits this error… it was due to the CustomControlDefaultConfig having a PrimaryEntityTypeCode that did not exist in the importing solution.

Before importing the solution, comment the following section out of the customization.xml:

<CustomControlDefaultConfig>
  <PrimaryEntityTypeCode>
    10062
  </PrimaryEntityTypeCode>
  <CustomControlDefaultConfigId>
    {fd3352f1-08a5-e611-80e4-fc15b4286cb8}
  </CustomControlDefaultConfigId>
  <ControlDescriptionXML>
    <controlDescriptions />
  </ControlDescriptionXML>
  <IntroducedVersion>
    1.0.0.0
  </IntroducedVersion>
</CustomControlDefaultConfig>

Or if you have orphan custom control records in your database (and are on premises), you may have to execute this type of SQL:

--***************************
--* TEMPLATE VERSION
--* Created on: 2017.04.04
--* Created By: begarza
--* LI/SR: 117040315545074
--* DESC: Clean up orphan records from 
--*       the CustomControlDefaultConfigbase 
--*       table
--*
--* REVIEW/APPROVAL
--* - RUN/CSS Team: sasing
--* - DEV Team: no need (org DB only)
--***************************

BEGIN TRY
BEGIN TRAN t1

-- Checking if we are on the right Org

Declare @OrgId as Uniqueidentifier
Set @OrgId = '$(Orgid)'

select * from Organizationbase ob (nolock) 
where ob.OrganizationId = @OrgId

If @@ROWCOUNT <> 1 THROW 55000, 
  'OrganizationId does not match!',1;

-- Remove Orphan records from the 
-- CustomControlDefaultConfigbase table
delete from CustomControlDefaultConfigBase 
where PrimaryEntityTypeCode = 10062

COMMIT TRAN t1
PRINT 'EXECUTION SUCCEED'

END TRY

BEGIN CATCH

ROLLBACK TRAN t1
PRINT 'EXECUTION FAILED :' + ERROR_MESSAGE()

END CATCH

Tip #856: Modifying disabled users

Disabled userToday’s tip comes to us from MVP Steve Mordue. (And you can submit your tips too by emailing them to jar@crmtipoftheday.com.)

Recently, we were working with one of our customers who was having some challenges with their daily manual import from their ERP to Dynamics 365. A fair number of records were throwing an import error indicating a duplicate CRM “user” existed. It turns out that some of their enabled users, also had identical disabled user records; I assume they had added, removed, then re-added the users at some point.
 
When you compare the enabled vs. the disabled records, the username (email address) was changed from like “mary@org.com” to “92fade2053df46beb2d8d1686b485497mary.org.com”; however the user’s full name was not changed. Their import source used the user’s full name.
 
Not wanting to create an extra step of adding the CRM username to the import file, our first thought was simply to remove the disabled users’ records. Dynamics 365 however, did not cooperate. Tier 1 support said we needed to do this from Office 365, which was not correct. We explored AAD with no luck. Tier 3 support, confirmed that it is not possible to remove disabled users records “by design.” I don’t know what that design requirement is, but we needed a solution.
 
Here is the workaround that we came up with:
 
The first step was to temporarily reverse the full-name format in Settings/Administration/General Tab from “First Name Last Name” to “Last Name First Name”
 
image005
 
You would probably want to do this at a time of day where new records are not being created.
 
The next step was to create an On-Demand Process on the user entity like below:

Image2 
 
In the Update User step, we selected an inconsequential field to update to force a refresh of the record, in our case we used Yomi First Name:
 
Image3
 
The next step was to open the disabled users list, select the offending ones, and run this workflow. The result was that the user full-name was reversed on these records.
 
The last step was to go back to Settings, and return the Full name format to the default.
 
We are now able to successfully import these records as the Full Name of the enabled user, is different from the Full Name of the disabled user record.

Tip #855: Mobile Learning Paths–how to make them work

When creating Learning Paths for mobile, it is important that you create them correctly. Current documentation appears to say that all you have to do is set the form factor to mobile for the guided task to be available from mobile. However, to make the learning path work on mobile, you also have to create the mobile learning path from the mobile simulator.

  1. Open Dynamics 365 mobile UI in web browser (as described in tip 127). The logged in user should be the one who has the Learning Path authoring privileges and the org should already have been set up to allow authoring of Learning Paths.
  2. Open the ellipsis (…) button at the bottom and you should find two buttons – one to view the sidebar on that page and other to Open the content library. From this content library (opened on the web version of mobile client), you can create sidebars and guided tasks which will associate themselves with the mobile client.


Tip #854: Beware of Using Xrm Client Functions As Callbacks

Today’s tip comes from the tipper who, despite his affinity with Microsoft Flow, earned his place amongst the real developers fair and square, and who is now known as Daryl “Always Raising” LaBar.

Daryl, you have the floor

Writing clean code is constantly at the for-front of developers, and usually, “less” code generally results in “cleaner” code. So when coding on-change event’s it’s very typical to see code like this:

Xrm.Page
  .getAttribute("fieldname")
  .addOnChange(Xrm.Page.ui.refreshRibbon);

favored over code like this:

Xrm.Page
  .getAttribute("fieldname")
  .addOnChange(function (){ 
	Xrm.Page.ui.refreshRibbon(); 
  });

(or even for the “cooler” JavaScript developers)

Xrm.Page
  .getAttribute("fieldname")
  .addOnChange(() => { 
    Xrm.Page.ui.refreshRibbon(); 
  });

Which works great, until it doesn’t. And it doesn’t work great in the interesting case when calling refresh, which then triggers a previously defined onChange event. In this particular scenario, the Xrm object model defined as the callback handler is no longer valid, due to a new one taking it’s place.

This would result in the code from the first example throwing this error: “Unable to get property ‘refreshRibbon’ of undefined or null reference”, but the second and third examples would execute normally as expected. This is because the callback is pointing to a function, which gets the current version of window.Xrm, which is valid, unlike the first example, where the call back is pointing to a specific version of Xrm (and in this scenario, an older invalid version).

So feel free to be “cute” in your OnChange callbacks… just not “too cute” and remember: Friends don’t let friends create onChange events pointing directly to Xrm functions.

Tipp Jaar’s $0.02 + tax

I don’t believe the last syntax, however cool and cute it is, would work in an obscure browser called Internet Explorer, including version 11. But then again, as the name suggests, that browser is for exploring Internet and not for doing any work around Dynamics 365.

Tip #853: Use caution with the View Layout Replicator

This morning we released episode 49 of CRM Audio (the original CRM MVP podcast). One of the topics we discussed with Andrii Butenko was our go-to tools in the XRM toolbox, and one of the tools mentioned was the View Layout Replicator. This power tool has saved many a CRM configurator hours of tedious frustration by making it super easy to apply the same field layout to multiple system views.

This tool should be used with care, as it can be used to make some unsupported changes to system views that can negatively impact user experience.

  • Quick search view: if you add related entity fields to an entity Quick Search View, the view will give you an “entity doesn’t contain attribute with Name = ” error message.
  • Lookup view: If you change the lookup view for an entity to have anything other than the primary “name” attribute, lookup fields that reference that entity will not show the correct value in the lookup field.

Both of these changes are things that cannot be done with the standard application configuration tools. So go ahead and replicate those view layouts, just proceed with caution.