of the
Whether your weapons are JavaScript and Plugins, or Processes and Flows, there is a tool you should pick up before going anywhere near the keyboard. That is, of course, the pen.
This is a lesson I learned while at university with my computing lecturer insisting we write out our code before committing it to the screen. Our major assignment was to code a token ring network controller. It might have been tough to write out every line of Pascal to make it work but when I finally entered it into the computer, the entire thing was bug free. The time taken to write it out and think it through calmly and carefully paid dividends in not having to debug my otherwise incoherent, spaghetti code.
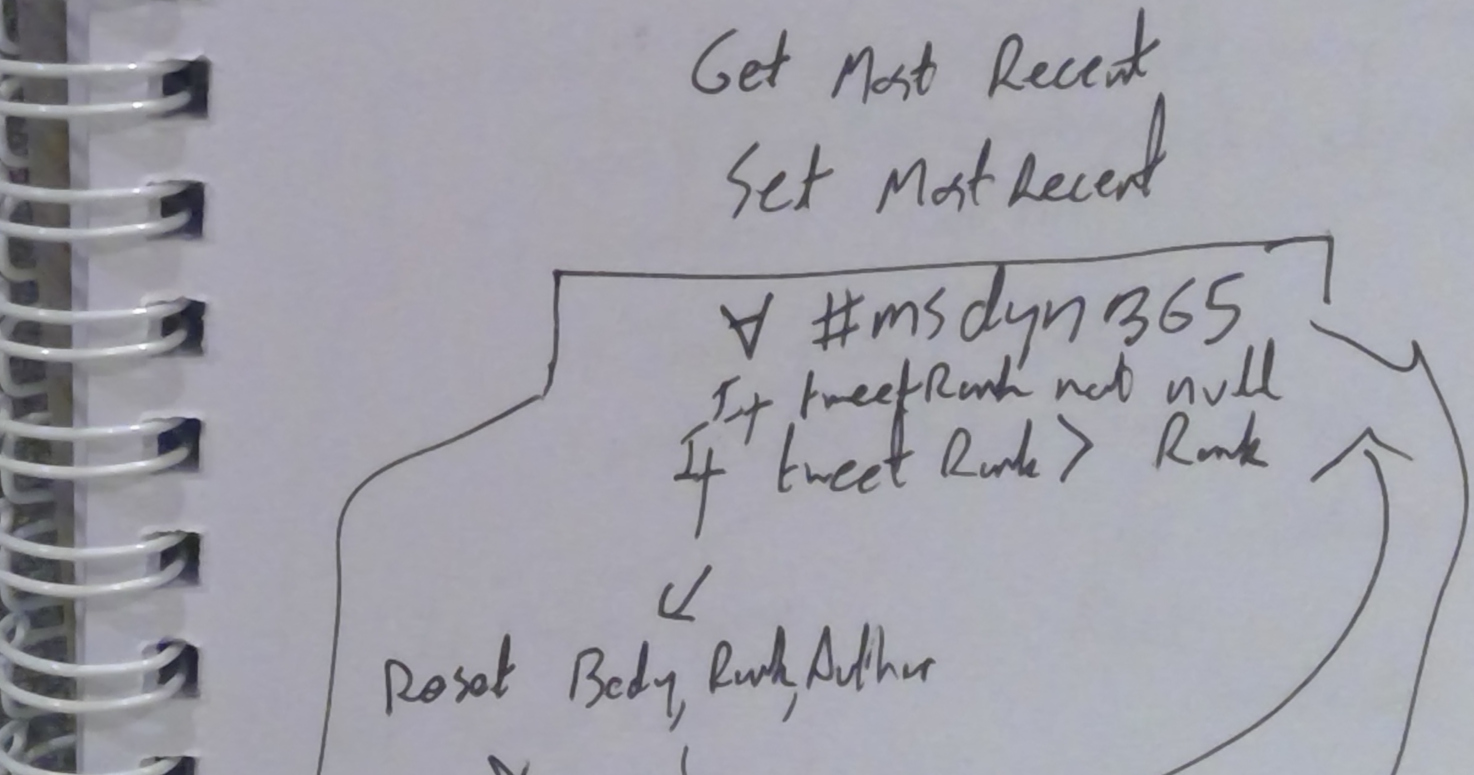
While I do not write every Workflow out in full before logging in to Dynamics, for the more complex ones there is a lot to be said for organising your thoughts on paper first. My general rule of thumb is if I cannot contain whatever it is I am developing on the screen (almost impossible for all but the most simple Flows), I write it out first. By going to a high level pseudo-version, I can see the algorithm on one page and usually improve my vision or discover issues which may not have been as visible in the weeds.
Often coders will lament that their non-coding associates do not have good habits when developing. For me this is the first good habit of any developer. The pen is mightier than the DWORD.