Tip #34: CRM Gustronomy – force the workflow order

Shan McArthur, our fellow MVP, asked the other day:

How can we order workflows? For example, I have an auto-number workflow that adds a case number to an entity, and I want that workflow to run before another workflow.

I considered using wait states – i.e.: workflow 2 waits until the case number is not empty then continues. That said, if they are both synchronous workflows, there is no wait condition, so that option is out.

Our guest tipster , probably after reading our tip about using child labor in workflows, immediately chimed in:

You can use a master workflow that fires these other workflows as child workflows – this will enforce the order you are looking for.

So here you have it, another Gustronomical tip!

Tip #33: Create a two-action ribbon button

Do your users have a CRM process that requires them to perform two unrelated actions in CRM? For example, a marketing department needs to run a mail merge and then have a workflow update the same selected records. Since these are separate actions, it can be cumbersome to the users, and can also have a fairly high potential for user error.

One great option is to create a CRM Command Bar/Ribbon button that launches both actions. In this post I’m going to show how to make a single button that launches mail merge and then runs an on demand workflow on the same selected records.

  1. Get the Ribbon Workbech from Develop1. Really. Get it now. Why don’t you have this already?
  2. Add a new button. You can re-use the standard Mail Merge icon by clicking on the standard mail merge button in Ribbon Workbench and copying the path for the two image sizes and pasting into your new ribbon definition.
  3. Right click on the standard Mail Merge button in Ribbon Workbench and select “Customize Command.” This will make a copy of the standard Mail Merge to selected records command that you can edit.
  4. Edit the command and follow the instructions in step 9 of this great post by MVP Scott Durrow to add the action to run the on demand workflow. You don’t need to do the Enable or Display rules–the standard Mail Merge command already includes the appropriate logic to display for only selected records.
  5. Publish and enjoy.

Now when users need to do their combined mail merge/workflow process, they can select the appropriate records, hit the button, do the mail merge, and the run workflow dialog will appear immediately when they are done.

This is just one example of how you could use this idea. You could combine virtually any unrelated function: resolve a case and create a new record, run a workflow and launch a dialog, launch two dialogs and a workflow. The possibilities are almost endless.

Tip #32: Change your CRM Online URL

Stuck with a shortsighted choice of URL for your organization, like choosespain.crm.dynamics.com? Now you can easily change it in Office 365 Admin Center. Simply edit the URL and, if it’s available, it’s yours! Few things to be aware of:

  • Old URL will be available for 24 hours after the change.
  • Advise users of the new URL and, if any of them use bookmarks, include instructions how to change the bookmark.
  • CRM for Outlook users who work offline must synchronize by using the previous URL to avoid loss of data.
  • All CRM for Outlook users must run Configuration Wizard. Offline users must complete the previous step first.

Tip #31: You’ve got instance!

If you have a CRM Online with 25 or more paid Professional user licenses, your subscription includes additional non-production instance. Paid is a keyword here that excludes some types of subscriptions like Partner IUR (Internal Usage Rights) benefits. The other non-obvious step, as told by none other but our guest tipster , is enabling this instance in the administration center. To access your instance, open Office 365 Admin Center, then click Admin->CRM.

This information and more can be found in Manage Your Microsoft Dynamics CRM Online Subscription document.

Tip #30: Use ConnectionDialog for easy connection to CRM

If you’re writing Windows Forms or WPF application that needs to connect to a number of Dynamics CRM organizations on ad-hoc basis, e.g. custom tool, then try using ConnectionDialog class instead of home-grown connection code. It is very surprising how little attention receive CRM Developers Extensions in general and a little obscure but very handy ConnectionDialog class, in particular. With the help of this class (that has even its own “dedicated” namespace Microsoft.Xrm.Client.Windows.Controls.ConnectionDialog), the usually verbose boilerplate connection code can be reduced to the following:

   ConnectionDialog cd = new ConnectionDialog();

   bool? connected = cd.ShowDialog();

   if (connected.GetValueOrDefault(false))
   {
      using (OrganizationService service =
         new OrganizationService(
             CrmConnection.Parse(cd.ConnectionString)))
      {
         // use CRM organization service
         WhoAmIResponse response =
             service.Execute(
                         new WhoAmIRequest());
      }
   }

Tip #29: Solve missing permission issues

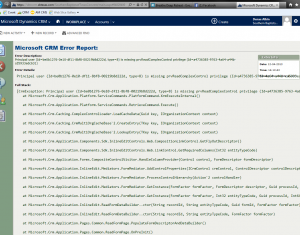
Sometimes, especially when you upgrade CRM or you add new entities, one of your users may see an error message like this:

The principal user (xxxxxxxx) is missing permission prvXXXXXXX

This error means that the user’s security role is missing a permission required for the object they are trying to view or the action they are trying to do. In this example, the user is missing prvReadComplexControl. From this we can gather that it is a privilege (prv) and it is a read privilege (“Read”), but what is “Complex Control?” When I look at security roles, I don’t see anything with the name “Complex Control.”

The answer can be found in this section of the Software Development Kit (SDK). Simply search on the page for the privilege in the error message, and you will see that the prvReadComplexControl privilege is read permission to the Process Configuration entity on the “Customization” form of security roles.

Note – the link referenced in this post points to the CRM 2011 SDK. The 2013 SDK is available to be downloaded here.

Tip #28: Beware of autosave in your scripts

CRM 2013 introduced autosave feature that, depending on a specific scenario, could be really helpful. There is also ability to switch autosave off across the organization using Administrator > System Settings dialog. Unfortunately, this flag only controls form behavior when user explicitly edits the record. The record will still be saved if user navigates away using, for example, browser’s back button. In this case, if your form has onload script that modifies the content, the changes applied by the script will be saved whether user intended it or not. This could be completely unexpected and needs to be handled with caution. It is possible to better manage autosave behavior but it does involve a bit more than a simple checkbox. Hopefully, future CRM updates will add some granularity to the autosave settings so that it can be truly switched off, when needed, without any side-effects.

Tip #27: Conditional action in dialog based on record counts

One of the more powerful things that can be done with a dialog is querying data. You can query data in CRM to populate a picklist, and my favorite use of it is to query data and then base a conditional action on the record count.

Consider this scenario: You sell to businesses, you have a dialog to create an opportunity, and you want it to act differently for existing customers than for new customers.

  1. Create a dialog that runs from the account entity
  2. Add a query CRM step and build a fetch to query sales orders for the selected account. See this post for detailed instructions on how the query step works.
  3. Add a check condition step. Select the name of your query step and select “records” and “less than one.”

This gives us the ability to dynamically query CRM data and conditionally do something .

Tip #26: Self-service for CRM users

One of the most valuable input channels for CRM customizers and developers is direct feedback from the users. The problem is that average user is either too reluctant or too busy to spend time on feedback and that pretty much rules out third-party systems like getsatisfaction, uservoice, etc, however useful and clever they might be. By the time user logs into the system of their choice, the context could be long forgotten and entering the suggestion becomes a painful trip down the memory lane.

Create a custom entity named, say, Suggestion or Feedback and add fields to capture the required information. Then add a workflow that simply emails the content of each newly created record to CRM suggestions or support mailbox. Now users can enter their feedback and suggestions when and where required without leaving CRM system.

Read more about enhancing the system

Tip #25: Make bit fields required in Business Process Flows

In the new Business Process Flow functionality in CRM 2013, what if you want to have a bit field that must equal yes before the user can advance to the next process stage? When you add a new bit (two option) field with the default values and make it required, when the record is viewed, the value of the field on the process flow will be set to no, but the user will still be able to move past the stage, because it will appear to CRM to contain a value (even though that value is no).

The answer is to change the options in the bit field to “Complete” and “Mark Complete (instead of “Yes” and “No”). If those values are present and the field is required, the business process flow will require the value to be “Complete” before proceeding.

The answer is that you need to click the “required” box on the process flow step, rather than set the requirement on the field definition in customization. If the field is required in customization, it will need to contain data, but it will treat “No” as a value, and allow the user to proceed to the next step. If the “required” checkbox is checked on the business process flow step, the process flow will not let users proceed to the next step without setting the value to 1 (yes).

Thanks to Adam Vero for helping make this tip correct. Check out his blog at http://blog.crmguru.co.uk/ for some great tips.