Tip #399: All aboard! (CRM Online Onboarding Success Center)

You’d like to try out the best CRM in business but not sure where to start? Or you’ve already tried, liked it and would like to buy a subscription? Purchased already and not sure what to do next? The good news is that now there is a single place where you can find this information :
CRM Online Onboarding Success Center
which is, in effect, a

step by step guidance to onboard y​our organization successfully on Microsoft CRM Online​

The center approach is very straightforward:

    1. Try
    2. Buy
    3. Onboard your organization
    4. Onboard your users

Everything you need to know, from signing up for a trial to empowering your users with Power BI and Office 365 Groups. Tons of goodness, training materials and videos.

That's $37 - Awesome!

Tip #398: Careful with those .js libraries

After denting his table, Mehmet “Sputnik” Ozdemir finally decided to use his call-a-friend card. The problem? After attaching this trivial piece of script to the birthday field

function dateonchange() {
   Xrm.Utility.alertDialog(
       Xrm.Page.getAttribute("birthdate").getValue());
}

one would reasonably expect to select a date and see that selected value (+local time) popping up in a box. Instead, the returned value was null. Sometimes but not always. Internet Explorer was spitting dummy telling the world that getHours is a non-existent function. Things were gloomy, table-denting, I’d say.

Collective brain traced it down to the inclusion of the well-known date manipulation library date.js. That’s what you get for a) using 7 years-old library and b) messing around with the prototypes of the standard javascript objects.

If you really want nice and easy date/time manipulation library then get on with the program and download moment.js library and then add multi-language support to top it off.

But the main lesson is that when you decide to use <noun of your choice>.js library in your next CRM project, test it extensively, always treat it as a suspect and give preference to those libraries that do not use jQuery.js.

Tip #397: Leave support user alone

Dynamics CRM TipperOur little truck seems to be burning lots of rubber in the past few weeks. Latest stop – Dynamics CRM Group on Facebook.
Albert “Chilli Crab” Han, a good friends of ours, awesome CRM trainer and equally awesome host, asks:

I did a retriveMultiple on systemuser entity on my CRM Online trial account, I found a “hidden user” with fullname as “Support User”, I tested a few more instances and they are the same. Anyone have any idea what is the purpose of this user? any implication if I delete it?

After a short argy-bargy about On-premises vs Online and if it’s ethical for a service provider to access your database, Joel “The House Captain” Lindstrøm draws the line:

Support users can’t be deleted. They don’t have access to your data. See https://msdn.microsoft.com/en-us/library/gg328485.aspx

Tipp Jarr’s Double Dipp

Correcting Joel is my favorite thing to do #47. Support users cannot be even disabled yet alone deleted.

Tip #396: Please subscribe me to all you’ve got

Dynamics CRM TipperIs there any CRM question that Adam “I bought the truckstop” Vero does not know the answer to? Apparently not. Another mini truck stop date with Adam.

When Mitch “Only in Texas” Milam asked for a potion:

Anyone have any magic for adding a Contact to multiple marketing lists at once? The Add to Marketing List functionality only allows one selection by default.

It took precisely 25 minutes for Adam to quickly pounce on the opportunity to highjack yet another truck stop:

Add a sub-grid for Marketing Lists to the Contact form.
Use the + (new) button above the subgrid to add a Contact to multiple lists at once.

So, from a view, select 1 or more Contacts to add to a single list (using the “Add to Marketing List” button);
or, open a single Contact and add to one or more lists.

You can’t select multiple Contacts and add to multiple lists at once (without code, custom dialog box, custom button etc).

Tip #395: Notifications

When I discuss requirements and user stories for Dynamics CRM deployments, a common request is that users be notified about various items. It seems like many people automatically think of email when they think of alerts and notifications. But I recommend that you stop before creating a bunch of email notification workflows and consider the downside of email notifications.

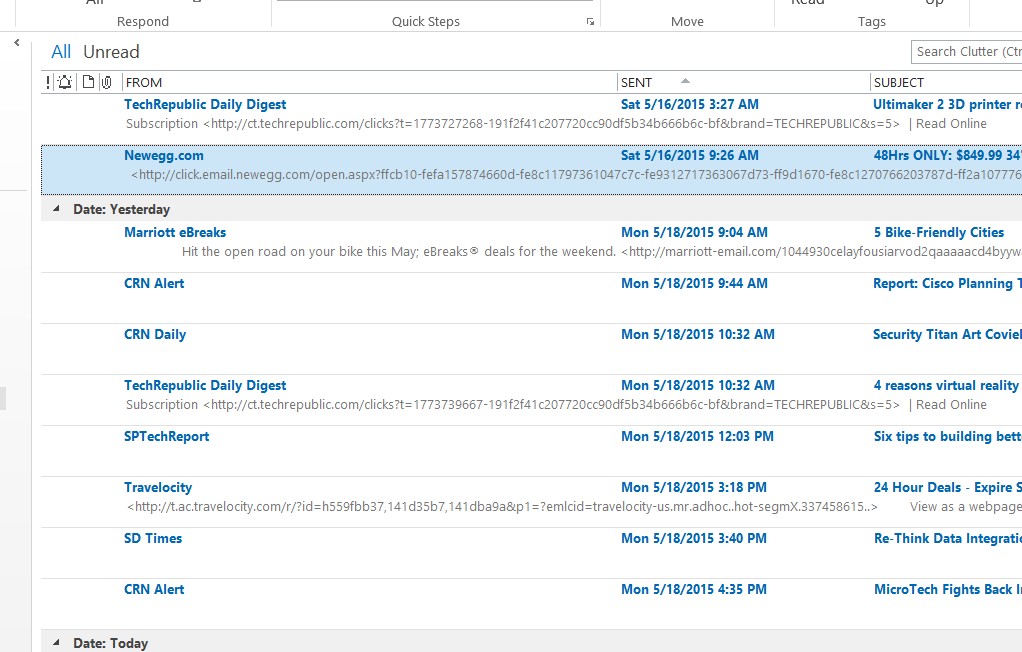
Consider the golden rule of CRM configurations: don’t do to your users what you don’t like to be done to you. Take a look at your inbox. Is it a fun place to be?

If you’re like me, your inbox is filled with impersonal notifications. (And if it is and you have Office 365, turn on the new Clutter feature).

Screenshot 2015-05-19 10.00.22

Email notifications are like your smart phone dinging. If it happens rarely, it is very valuable. If it happens every three minutes and for 50 different reasons, it is a burden and loses its value.

For that reason I always recommend that people only use email alerts for truly urgent alerts. Other than that use a more user-friendly alert system. This can be something on the dashboard, A view that they check in the normal course of the day, the social feed, or send them an sms text message.

Tip #394: Where did the opportunity subgrid pop-out button go?

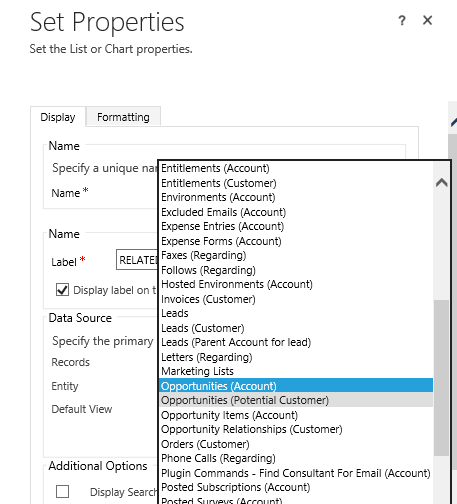
In Tip #393 I recommended replacing the opportunity “Potential Customer” field on the form with the accounted lookup field if you just want to have the customer lookup return account records. Just because you do this on the form does not mean that you should totally replace the “Potential Customer” field.

One of the areas where you will still want to use the Potential Customer relationship is for subgrids. If you add a subgrid to the account form and select the Opportunities (Account) relationship in the subgrid properties, the opportunity list will display correctly, but the “pop out” button that opens the full grid will not be displayed on the subgrid.

Screenshot 2015-05-18 13.20.57

Remember, even if you use the account lookup field on the form instead of the Potential Customer, the Potential Customer field will still be populated when you select an account. So always use the Potential Customer relationship for related opportunity subgrids on account forms.

Tip #392: SLAs for dummies, Part 3: FAQ

¡Yo, amigos! Our semi-permanent resident by now Pablo “CRMGamified” Peralta wraps up SLA thingabob he started in la primera parte and continued in la segunda parte.

¿How do we set our Business Hours?

We can set our business schedule at Configuration > Service Management > Customer Service Schedule. Once there, click on “+New”, select your calendar name (i.e. “Default Business Hours”), works days and hours, and whether your business hours apply during holidays.
Here’s an example for a bank that needs to properly count days (where 2 days need to be counted as 2 days) and not weekends:
Business Hours Sample

Business Hours Sample

¿I can only set a 3-day maximum to my SLA Item. Can I enter a larger number?

Good news: YES, you can 🙂 Even though the system suggests several options, you can also enter your own.

¿I’m not using Entitlements, then can I have several Default SLAs?

The answer (unfortunately) is NO. You can only have one Default SLA at any given time.

This means that if we’re not using Entitlements, our SLA configuration will be based on the SLA Item configuration we are using in just 1 SLA (our Default SLA).
Each SLA is associated to certain Business Hours (optional) and is Applicable From a set date. Therefore, all of our settings will be based on the same Business Hours and same Applicable From dates.

Plus, remember (as I mentioned before :)), SLA Item records are not customizable and, therefore, can’t be adjusted – not even the Name field’s length. Therefore, it will be important to set a standard to name each SLA Item if we’ll be creating many of them (just imagine a bank’s subject tree, which is precisely what I’m working on right now :)).

¿How do I deactivate an SLA Item?

The answer is: you CAN’T. You can only remove an Item and, of course, re-set it later. Plus, in order to remove an Item you first need to deactivate the entire SLA.
If you wish to support me with your vote to make the SLA Items customizable and have their own status to deactivate them, here’s the link to
my petition on Connect.

¿Ok, so, how do I completely deactivate my SLAs?

If we only have one SLA -or several and need to individually deactivate them- all we need to do is open it and click on “Deactivate”.

If we wish to completely deactivate the SLA feature, we can do so in the “Service” tab found in System Settings, where we can select “Yes” to the Deactivate SLA option.

This is especially useful during maintenance times and when we’re importing cases from other systems and don’t want any SLAs to run just yet.

¿I’ve deactivated my SLA by the Timer’s still running. How can I make it stop?

Bad news: even if we deactivate everything, the Timer controls depend on all date fields (the Applicable From and Applicable When fields for the SLA and all KPIs) and therefore “ignore” that the SLA has been deactivated. So it just keeps on running.

Here’s a workaround: set one Success Criteria in the SLA and make all our cases fulfill the condition successfully so it’ll stop counting.

¿My Timer says “NaNh NaN NaNs” or huge numbers. What did I do wrong?

Well, everyone makes mistakes but you’ve probably encountered a “known issue” (bug) which I’ve faced and has driven me insane in the past.

This happens on CRM ever since CRM 2013 SP1 UR1 (and it still remains in 2015) when the CRM’s App Pool’s identity has a different regional setting than en-US, something that usually happens when working in Spanish or different language than English.

The good news: there is one workaround we can apply that, at least in my case, works perfectly! You basically need to change the regional settings of that identity to en-US. There is an explanation to this “known issue” and a workaround.

The second good news is that this problem is set to be solved in the next release (CRM 2015 Update 1 “Carina” – only available online) and I gather that we’ll be able to get on-premises fix via Microsoft support.

¿My SLA Item is running but doesn’t trigger any actions. How do I see all action errors within my SLA Item?

You’ll need to access the systems jobs – SLA Items are triggered as workflows and it’s there that you can see all errors.

¿I have set everything but the SLA does not run. Why is this?

Let’s start by seeing how we can easily check whether the SLA is running or not. In the default Case form we can access the Enhanced SLA Details section:
SLA Troubleshooting Step 1
This is where we’ll find the “famous” timer and KPI status tracker.
When an SLA Item is triggered because its “Applicable when” conditions have been met, we should see something like this:
SLA Troubleshooting Step 2
So, what happens if we don’t see this?

  • First we must verify we’ve activated our SLA. Check the “Activate” button:
    SLA Troubleshooting Step 3
  • Watch out: this isn’t enough! We must also set it as our Default SLA to really activate it, unless we are using the new Entitlements feature where each entitlement is associated with an SLA. If we are not using Entitlements, then we need to set our SLA as our default.
    SLA Troubleshooting Step 4
  • If we ever deactivate our SLA we need to remember to set it back as our Default SLA once we reactivate it.
  • Tipp Jarr’s Double Dipp

    ¡Muchas gracias, amigo!

Tip #391: Mandatory fields in dialogs

Dynamics CRM TipperMini truck stop.

Straight after visiting the CRM facebook group.

Ankit Shah: CRM 2013 SP1 – is there a way that we can set the dialogue fields as required?

Joel Lindström: Not exactly, but you can trick it with conditional logic. Have a check condition that checks if the field is populated, and if it is not have a page that tells them they must populate it or loop to the page again via a child dialog.

Tip #390: SLAs for dummies, Part 2: SLA

¡Hola, amigos! Our good friend Pablo “CRMGamified” Peralta continues about all SLA things he started in la primera parte.

¿How is the SLA applied?

We will see an “SLA Details” section where we can set SLA Items, each of their conditions, associated KPIs, and Alert or Failure actions to take whether set service levels are met or not. For instance:
SLA Definition
SLA Conditions
This item is set to apply a 10-day tolerance SLA with a warning sent 3 days after certain conditions are met. An email will be sent when a deadline (failure or warning).

Take the following into account:

  • The first SLA Item that fulfills the specified conditions for a KPI in “Applicable when” will be the only one set off for that KPI from all the SLA Items within the “SLA Details” section. No other SLA Item will be set triggered, even if it could also potentially fulfill all conditions.
  • Therefore: pay close attention to the order in which you create / place SLA Items, making sure you clearly specify the conditions to trigger the correct Item. For instance, verify client type (VIP client, Premium client, standard client, etc.) as the first condition:
    SLA Details
  • Avoid including fields that significantly vary in the conditions, since this would force the system to constantly re-evaluate them, potentially impacting performance.
  • Situations where one (or other) SLA Item applies to the same case more than once can emerge, unless we control them. This could happen, for instance, when changing a case’s priority, triggering the system to re-evaluate the “Applicable when” conditions. If conditions are met, the specified actions will be executed again. In order to prevent these kinds of situations, we need to flag some fields to avoid multiple processing.
  • You can’t change the length of the field ‘Name’. You’ll wonder why I highlight this :). Well, we are going to need to clearly differentiate each SLA Item from the next, especially if this turns out to be our default SLA (see next section) – and SLA Items lists can grow to be extremely long. It might be useful to establish a name/code standard.
  • An SLA Item’s KPI can’t be edited after the record is created. Therefore, pay close attention to the selected KPI. You’ll find two by default: “Resolve by KPI” and “First Response By KPI”. The former measures case resolution while the latter measures first responses to a case. In upcoming posts I’ll share how to create new personalized KPIs to track as well.
  • Even though the list of available actions for each situation (Success Actions, Warning Actions and Failure Actions) is very similar to the one on Workflows, NOT ALL actions are available: you can only Send Email, Create Record, Update Record, Assign Record and Change Status.
    SLA Workflow
  • Actions will be triggered as asynchronous workflows, so they might not happen at the right time. If the Async Service is down, they will not be set off automatically.
  • At the moment, there is no supported way to set SLAs by using SDK. Hopefully this situation can be improved very soon.