of the
I really like mini truck stops when two or more MVPs brainstorm a random problem, usually because they are bored 😈.
Help me understand scenarios where one would use a guid() expression in flow when creating new rows.
Antti Pajunen
What Antti left out was (reasonably) common wisdom that explicitly setting identifiers for new records is possible but frowned upon due to the performance implications. (Cue long discussion about sequential guids.)
This section was intentionally left blank because it would have been otherwise filled with the intense discussion where do guids sit in the order of the universe, are they truly unique, and whether it’s OK to use hexadecimal “beef” in guids when creating a Power Platform solution for Beyond Meat, Inc (NASDAQ: BYND).
Solution looking for a problem
It didn’t take long for the kumbaya to climax at this brilliant suggestion:
You can create records in flow and bypass required fields by using an Update
Aiden Kaskelastatementaction and generating a new ID using the guid() expression.
Problem looking for a solution
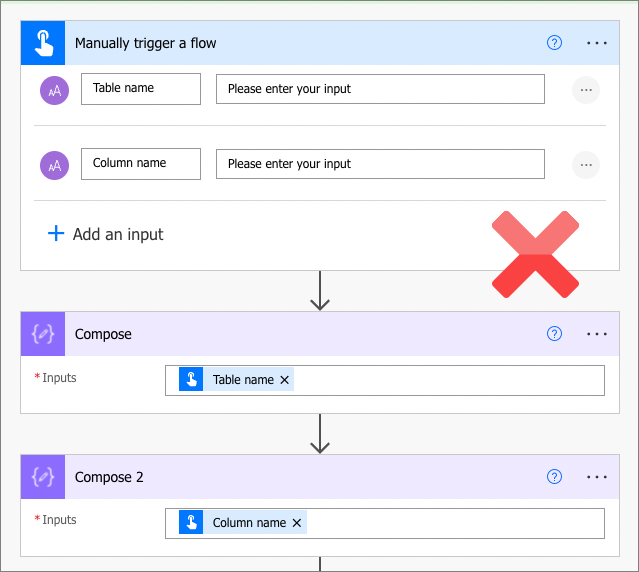
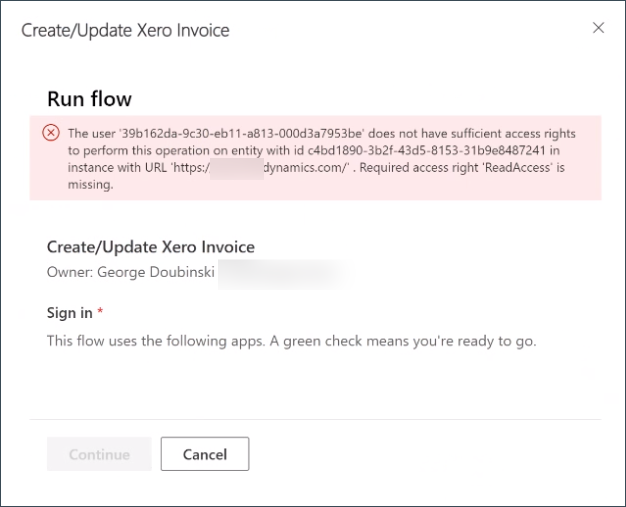
Topic is a required column in the lead table. Who would put a Topic: input textbox in a contact us online form? That’s right, nobody. But if we trigger Power Automate with the form submission, how do we create a lead record?

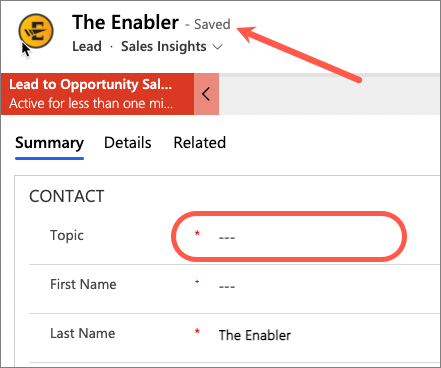
Technically, we can put some default text in like “Created from online enquiry form”. But that would simply cement this meaningless text across the entire lead table. What if you could create a lead record without a Topic? The first user to open the lead in a model-driven app would be forced to put something in the Topic column before saving the record – more chances of having something relevant recorded.
Solution ❤️🫶🫀 Problem
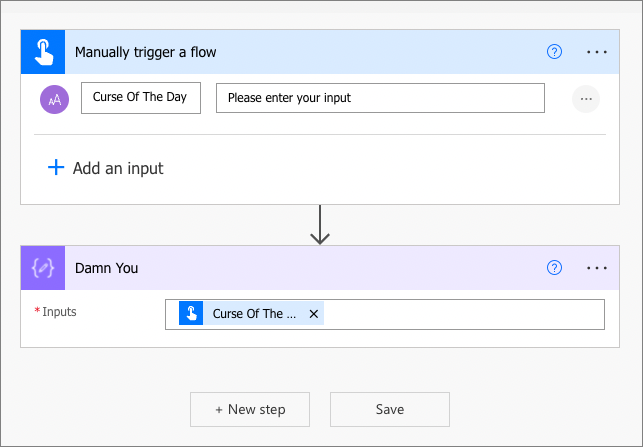
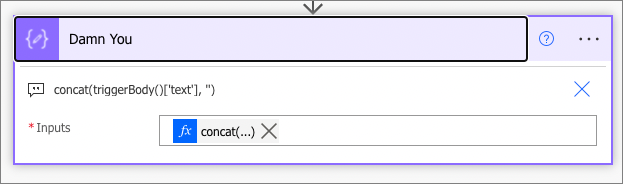
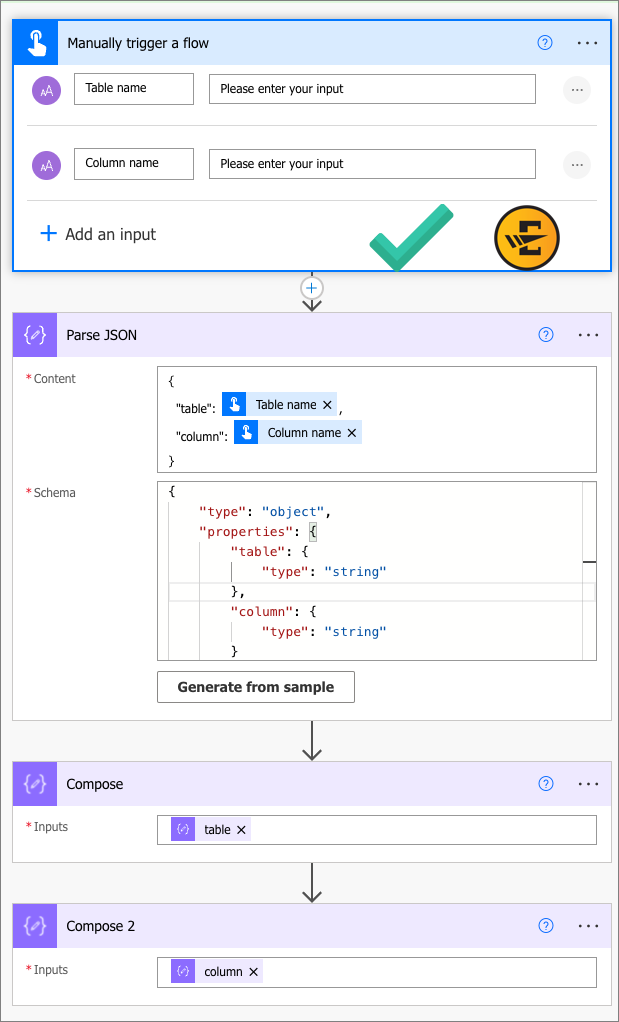
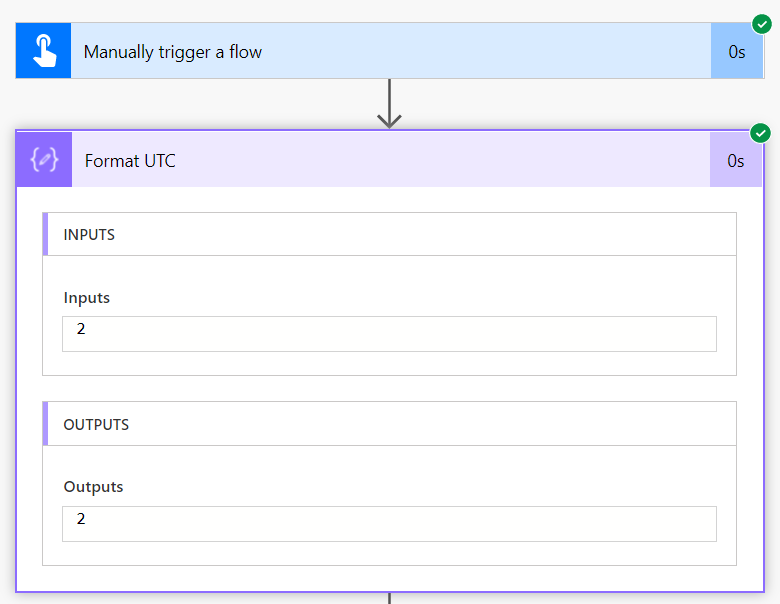
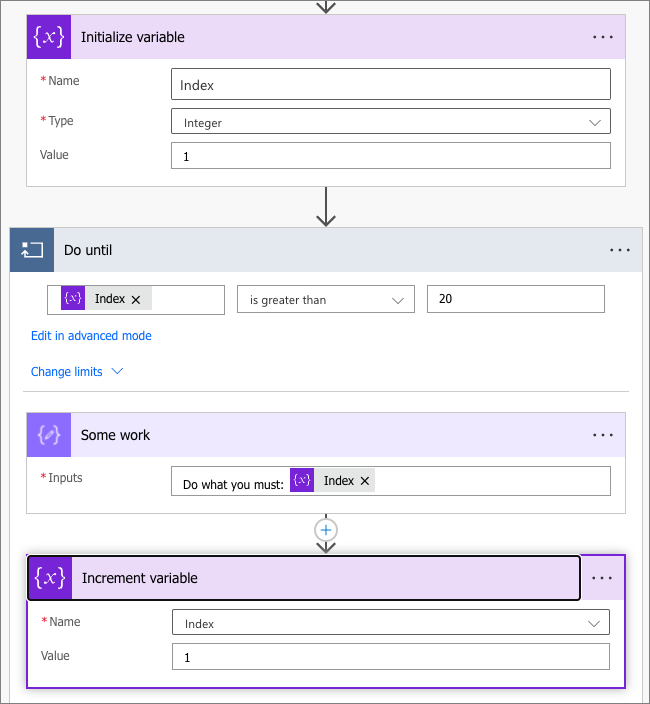
Use Update a row action and set Row ID to guid() expression. This action does not have any required columns and behaves like an upsert operation: if ID is found then it’s an update otherwise it’s an insert. Using a freshly baked guid guarantees nothing will be found and forces a new record.
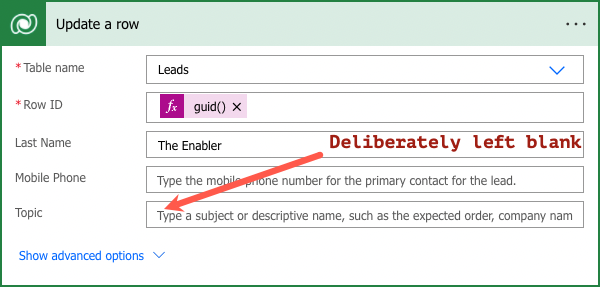
The end result? Lead with the name and perhaps some other information but without a topic!
Cover image by jette55 | Pixabay.

 Now of course you can see why we’ve been practicing the art of replacing triggers without breaking anything else.