of the
When deploying Dynamics 365, there are frequently multiple types of companies and organizations that you will be tracking in the system. Some represent customer/client organizations, some may be support and advisory organizations like accountants and legal firms, and some may be miscellaneous types of organizations, such as trade associations.
How should you manage multiple categories of company relationships?
The most common approach is to use the account entity for all organization types, and use a field like relationship type or a custom option set to flag companies by their type or category. Views can be filtered based on the type of company, and business rules can conditionally show or hide field and form components based on type.
Another approach is to create custom entities for each type of company. One reason commonly sited is “I might need to use accounts for another reason in the future, so I don’t want to customize the account entity.”
Before recreating the account entity as a custom company entity, consider strongly what you give up by doing this:
- Multiple addresses: Account has a unique address capability that supports multiple addresses—the first two addresses are displayed on the company form, but these address records live in the related customer address entity. While you can create a custom address entity tied to a custom company entity, recreating the unique logic where the addresses are stored in the related entity as well as displayed on the form and entity views would require development. If you need multiple addresses, use the account entity.
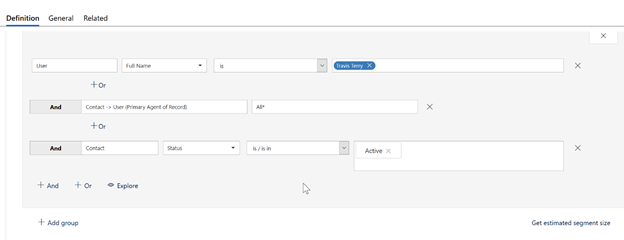
- Contact hierarchy: Accounts are the parent of contacts. Activities related to contacts roll up to the parent account record. This hierarchy cannot be replaced by a custom company record—you can create additional relationships with custom company entities, but the standard account/contact relationship cannot be replaced. If the company has contacts with their primary company relationships to this type of company, or if you want to roll up activities from contacts to companies, use the account entity.
- The standard map control does not support custom company entities.
- Hierarchical relationships between parent/child accounts and the standard hierarchy visualization and roll up of child account activities to parent account only work with standard account entity.
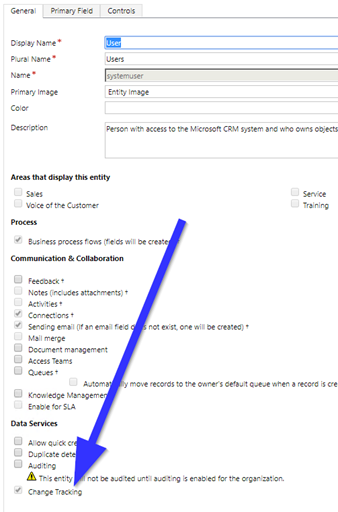
- Dynamics 365 includes a special type of polymorphic lookup field called a “customer” field. This field allows a record to be linked to a company/account or a contact. Dynamics 365 does not allow for custom entities to be selected from polymorphic lookup fields.
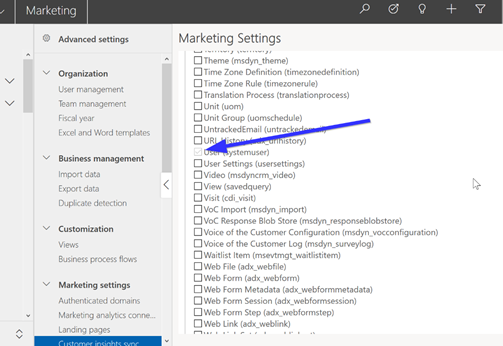
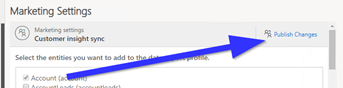
- Marketing won’t work: Marketing lists can only work with contacts, accounts, and leads, no custom entities. Dynamics 365 for Marketing can send to accounts and contacts, but not custom company entities.
So in almost every situation, the account entity should be used for company records of all type.
What are the exceptions?
- Minor types of companies that are not relational and have minimal attributes—think of a type of organization with no contacts, address, and just there for lookup purposes.
- Unqualified/unverified companies imported from business cards or web forms that we don’t want to pollute the account entity. For these you could use the lead entity (or maybe not https://crmtipoftheday.com/501/should-you-use-the-lead-entity/).
Don’t believe me? Here is what other MVP’s have to say:
Using a custom entity for companies is at the top of the list for 10 things you never ever want to do in your customer engagement system. I run into this all the time where clients think they need to set up a different entity to track vendors separately from their customers. put them all in the account entity which is the bucket for businesses and filter them based upon a option set if you don’t go down this path you lose all the built-in functionality of parent-child relationship of businesses to contacts and you end up destroying the overall Integrity of your business model.
Jerry Weinstock
We always use the account as a base for organizations. Then if we need to extend it say it’s a school with specific requirements around it, we then create an entity ‘school’ but looked up to ‘account’ which hold all the basic info like you pointed out. Or sometimes it’s a matter of adding a flag to the account. But I can’t remember an instance in the last 12+ years of creating a custom account entity.
Gayan Perera
The logic of creating custom company entities doesn’t make a lot of sense. The only time I’ve ever thought of not recommending account or contact is if they plan on deploying multiple third party solutions to the same instance. But even then, just be thoughtful in your design and understand the third party components.
Jim Novak
I had a customer once that had repurposed the contact entity and created a custom contact entity. They ended up not being able to use any marketing-oriented solution or feature.
Ulrik Carlsson
If they don’t use the account entity, they might as well just get CDS without any first-party apps and rebuild everything from scratch. Cases, Opportunities, Contacts, all roll up. Are they going to avoid those as well? (For what it’s worth, ClickDimensions handles using Accounts for different relationship types like vendor/partner/customer just fine).
Matt Wittemann
Cover photo by Blaz Erzetic from Pexels