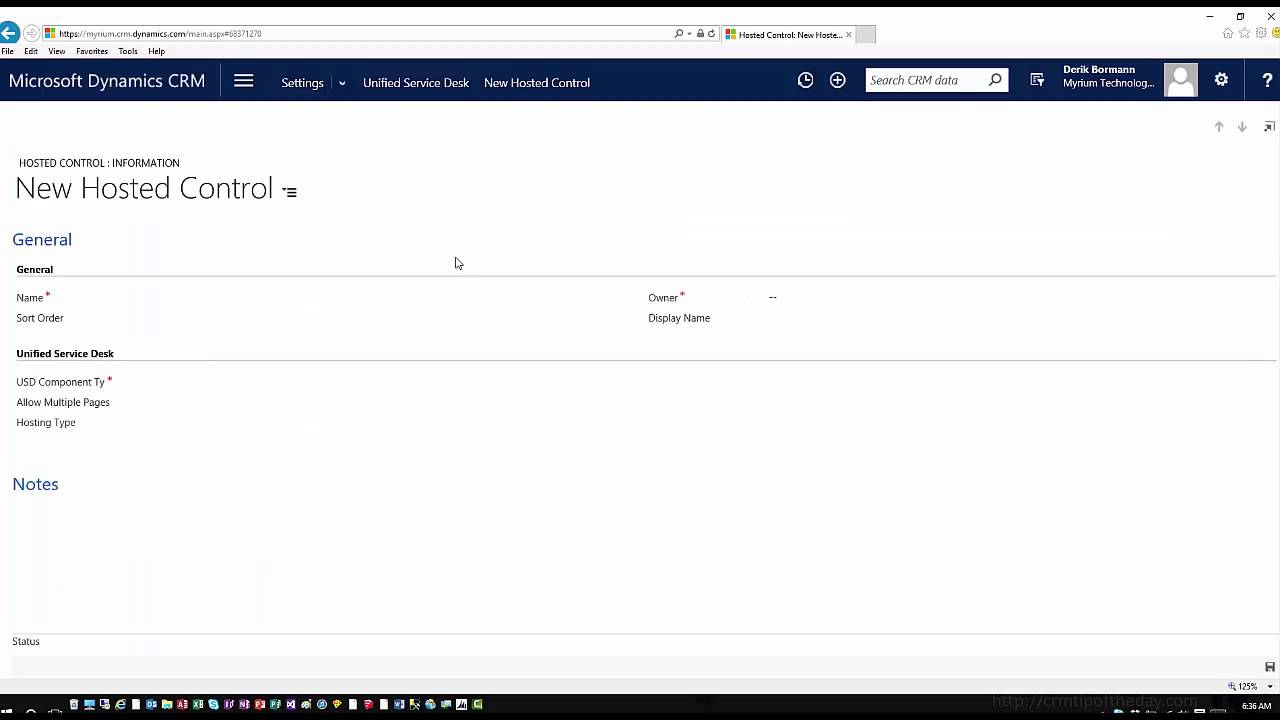
Tip #509: Pumpkin-Spiced CRM

Themes in CRM are a subtle, but nice way of making CRM visually adapt to your Organization.
(Themes are available in CRM Online beginning with the Spring 2015 release – and on premise they are expected in the CRM 2016 release.)

Using the very cool online tool: CRM Theme Generator created by the talented Guido “Han Shot First” Preite , you can test and share your creations before committing.  (Also see Tip #483 for a nice demonstration of how to create/update themes in CRM.)

CRM Theme Generator

A simple thing is to change the title bar color in DEV vs PRODUCTION – I always want a BOLD indicator that I’m working in DEV – And, when you have users in a separate Training environment. – Give it a BOLD and distinct color to ensure that they are less likely to enter production data in training – or vice versa.

It can also add some variety and visual interest – but that’s a boring, corporate-marketing speak way of describing it. – Why not amaze friends and annoy colleagues by adding ‘holiday-themes’!

Here’s a Pumpkin-Spiced-Latte CRM Theme – Let’s just say “I dare you”.

PSL Theme
If you have a great color-combination theme or one that celebrates a holiday, football franchise or a theme that is otherwise visually arresting – share a link to it in the comments.


Tip #508: Tipster guide to exporting and importing product catalog

It’s Friday and time for another… What? We don’t have one? The camera was stolen? And the producer is missing? Let me start again.

It’s Friday and time for another ¡Como estas amigos! from our good friend Pablo “CRMGamified” Peralta. After reading this you’d have to agree that this walkthrough is just as good as any video. So without further ado.

Step-by-step Guide to Exporting and Importing the New Product Catalog with Configuration Migration Tool

Introduction

Situation

You’re using CRM 2015 (Onprem or Online). You’ve already created your product catalog, including all family structures and price listings. Now you wish to export it into your testing or development environment, taking it toward production.

The bad news: unlike previous versions, you can no longer export and import with Excel. If you do this, your family hierarchy will be left behind.

The good news: you can export and import the Product Catalog using a new tool introduced into the CRM SDK as from CRM 2015, called Configuration Migration Tool.

In this article, I’ll share a step-by-step guide on how to do this. These are the steps I recently followed to carry the Product Catalog from one environment to the next for a client, so I hope they work for you as well.

Prerequisites

You need to download the Dynamics CRM 2015 SDK, in case you haven’t already. Once you’ve downloaded and extracted the package, you’ll find the tool we need inside SDK\Tools\ConfigurationMigration with the file name: DataMigrationUtility.exe.

Exporting Our Catalog from its Original Environment

We then open SDK\Tools\ConfigurationMigration\DataMigrationUtility.exe.

  1. Create Schema
    Create schema
  2. Connect to your CRM
    Connect
  3. Select your solution (or default solution) in order to select the Currency entity (transactioncurrency) and then click on “Add Entity”.
    Select solution
  4. In Tools > Configure Import Settings, we select the fields we’re going to consider as unique identifiers for the Upsert when we import. In other words, we can choose they key (one or several fields) to figure out if the destination record already exists -or not- and, in this way, determine if the application needs to insert or update.
    Select fields
    Additionally, we can choose to deactivate plugins during the import, in case any of the selected entities have associated plugins.
    Deactivate plugins
  5. We validate the schema in Tools > Validate Schema
    Validate schema

    Validate schema

  6. Save and Export. Doing this we’ll be prompted to name the file. Let’s call it “Currency”.
  7. We then agree to export all data and name the data file (i.e. “Currency.zip”)
  8. The end result should look like this:
    Export end result
  9. We then repeat steps 1 through 8 for the Price Listing entity.
    Price listing entity
  10. We again repeat steps 1 through 8 for the Product entity, in order to export products.
    *** IMPORTANT ***
    Products, families and sets must be Active in order to be exported. Drafts will be ignored when exporting. So make sure you individually activate all products or each family hierarchy before running.
    Product entity
    If you’re not using entitlements or sales literatures, you’ll want to remove all relationships to at least avoid alerts (do this by right-clicking on Relationships – “Remove Relationship”).
    Remove relationship
  11. We once again repeat steps 1 through 9 for the Price Listing Element entity. This way, we can export all prices for each product in each price listing.
    Price Listing Element - 1
    Price Listing Element - 2
    Price Listing Element - 3

(Phew! Half way there! – t.j.)

Importing the Catalog into the Destination Environment

  1. Once inside the application, go to “Import data”.
    Import data
  2. Continue
  3. We log on and select the destination organization.
  4. We first import Currency. We select the corresponding zip file (Currency.zip)
  5. We then repeat steps 12 through 15 to import Price Listings (I had 3 in my case)
    Import Price listings
  6. We can now import Products (repeating steps 12 through 15 for the Product zip file). It’s important to first import currency and price listings before importing our products. Why? Because if we already have price listing elements, then the first price listing associated with a product is considered its default price listing and, therefore, creates a dependent lookup.
    Import products
  7. Last but not least, we import the Price Listing Elements, which actually include the prices for each product in each listing. We should attempt to import these once currencies, price listings and products have already been imported.
    Import Price Listings Elements
  8. That’s it – we now have our catalog up and running!
    Hurray! Product catalog is up and running

Troubleshooting and warnings

Not everything works this wonderfully. If we receive any errors or warnings, here’s how we can see their details:

First we must go back to the application’s home page. We can then check import logs in the Log menu:
Accessing import log - 1

Accessing import log - 2

The error in this example shows that there is not “dyn_cd_producto” field in the destination schema. Therefore, here’s a good tip: if you customized any of these entities (i.e. added new fields), then you need to make sure that you apply the corresponding solutions so that the original and destination structures are the same.

For more information on the Configuration Migration Tool, click here.

I hope this was useful! As always, let me know about your experience in the comments or leave a message in the community technical forum if you need any help.

Cheers!

Tipp Jarr’s Double Dipp

¡Ay, caramba!

Tip #507: Move Access Team templates in style

Back in Tip 322 (When upgrading, do a dry run), I referenced an issue with Access Teams. The team templates don’t move with customization. So if you use Access Teams in your configuration, when you move your customizations to a new org, the team templates won’t be there, and you will get an error on the form. Even if you manually create team templates in the new organization, it will not work, as the new team templates will not have the same record ID. You have to move the team templates before you import your customization. However, there is no easy way to do that. You cannot add them to your solution, you cannot move them with the import utility, and you cannot move them with the Configuration Migration Utility in the SDK. Unless you have a third party tool, such as KingswaySoft or Scribe, there is no free way to move them.

Until now. Lucas Alexander has recently released a plugin for the XRM Toolbox that is the easiest possible way to move access team templates. Not only will it move the templates, it also give you the option to enable access teams on the entity in the target if they are not already enabled (something that I have forgotten to do many times).

Download the plugin here.

Read more about it and see the pretty pictures on Lucas’ blog.

Tip #506: Knowledge management best practices

We don’t do full truckstops very often but when we do, they are full of wisdom and knowledge. Knowledge, that needs to be managed. Today we have some distinguished truckies sharing their views on the subject: Mitch “Only in Texas” Milam, Nicolae “Almost Tesla” Tarla, Adam “Parature” Hong and Shan “I used to be an MVP” McArthur.

truckstop

The Dynamics CRM team recently announced fantastic knowledge management features coming in Dynamics CRM 2016.

Now that we have excellent knowledge management functionality that can be extended to almost every entity in CRM, my question was what are the best practices for using this feature.

How does a company start building out their KB content if they don’t have any? How do they select the appropriate levels of granularity and classification?

We received some great suggestions on this topic:

Mitch Millam

In all honesty, all you have to do is create a new article for any problem or question encountered that is not already in the KB.

  1. Support Professional creates the article, after finding a topic that meets the criteria.
  2. Technical Lead for the validates the information and process documented within the article.
  3. It goes in to an internal–published state for additional review (product team)
  4. Assuming approval, it gets published.
  5. Visibly can be: Internal, Private, or Public, depending on the nature of the topic.

Nicolae Tarla

We use “librarians” to define taxonomy and metadata structures to organize KM. This used to be a practice that was being used almost exclusively on SharePoint, but in the last few years it became relevant for CRM also, and we now see a split down the middle on resource allocation.

The following books are very helpful ion this topic:

  1. Managing Electronic Records: Methods, Best Practices, and Technologies, ISBN: 978-1118218297
  2. Document Management for the Enterprise: Principles, Techniques, and Applications, ISBN: 978-0471147190

Adam Hong, Microsoft

I’ve found that the knowledge management process can be very similar to development processes, and like development processes, the KM process can vary quite a bit from organization to organization.

At its core KM is about the following cycle:

  1. Identifying knowledge gaps. Knowledge gaps defined as content that needs to be available to your customers/employees/whatever audience)
  2. Creating/Refining your knowledge accordingly based on knowledge gaps (this can have its own workflow)
  3. Analyzing data related to knowledge to gain insight. This can be accomplished by looking at:
    • Searches performed
    • Ratings
    • Feedback
    • Views
    • Any big data kpi related to your customers/audience
  4. Use the insights to get back to step 1, identify knowledge gaps.

Knowledge should be one of the most important aspects that an organization maintains due to employee churn, and the impact that good knowledge can have on onboarding and how efficient each employee/customer is, among a myriad of other reasons knowledge is important.  One client that is very effective with knowledge management has a team that is dedicated to keeping track of when articles expire, which then kicks off a review process for each article. Employees are categorized as SMEs for each article. When articles are up for review, an SME will review the article for updates, which will notify the KM team if its still valid or if it needs changes. From there they will work with the SME to get the content correct if needs to be revised. They do this every month to maintain their KB.

Shan McArthur

My recommendation is to keep the ‘process’ as thin and light as possible. If the process is a burden, the article will not be written and you will have a poor KB.

Keep the process light and make it easy to publish.  You can always review and reorganize as you get new content and find better ways of breaking it up.  The same can be said about standard formats – the more rigid your format and structure is, the more resistance you are going to have to get people to use it.  That is why I love our portals – you can just start with a blank page and type – no format is required.  Add pictures if you want, or even add them later.  Then build out your instructions, supplement them with KB articles.  Hook up feedback to those pages so that you can review things and improve them immediately.  Allow your customers to suggest an article.  Review search terms that customers use.  Take cases and add a field to ‘recommend as article’.  All of these things will help you properly target your content, which is really helpful.  Just remember, that in the end, your knowledge system will be build one article at a time.  It always starts out sparse, but if you keep it agile, easy, and respond quickly to feedback, it won’t be long before it gets filled out and becomes very valuable.

Tip #505: Set active — what’s it good for?

set active You may notice that in CRM 2015 Update 1, when you click to a different stage in the process flow, the “Next” button changes to “Set Active.” But you may also notice that it is grayed out and doesn’t do anything. The “Set Active” button is designed to allow users to jump back to an already completed stage. if you click on a stage in the past, you can click “Set Active” and move back to the completed stage. It cannot be used to move ahead to a different stage. Thanks to Chris Treptow for helping solve the mystery.

Tip #504: Calculated Fields Min/Max Values

When setting up a Calculated Field it is imperative that you are aware of the Minimum/Maximum Values in the fields that make up the Calculated field. The Wizard will not prevent you from creating a calculated field that is dependent on fields that allow input that will be outside the min/max values allowed for the calculated field.

In the example below Field A and B allow Minimum values of less than Zero (0). However the Minimum Value for the Calculated field is set for Zero (0). You won’t discover this issue until users start entering data into the form. They will not be able to Save the record.

Calculated Field Out of Range Error

Calculated Field Out of Range Error

Calculated Field Min Max Values

Calculated Field Min Max Values

Tip #503: Tipster guide to USD Window Navigation Rules

It’s Friday and time for another video. In our last of Intro to USD configuration series we explore Window Navigation Rules. Derik walks you through what they are, how USD uses them, and how to create them.

YouTube player

Give us your feedback, all of it: good, bad, and ugly, I’m sure we can take it. Suggest new topics either in comments or by sending your ideas to jar@crmtipoftheday.com.

Tip #502: Who moved my activity

tl;dr

When record ownership is important, use synchronous workflow that impersonates the caller.

The Stop

Dynamics CRM TipperOne of the signs of greatness professionalism is not to be afraid to ask questions, no matter how trivial or silly they might sound. Mitch “Only in Texas” Milam has the microphone:

Q

Activities ownershipHi Folks,

This is such a basic question that I am almost too embarrassed to ask – but not that embarrassed.

I have a workflow that is closing phonecalls and when you look at the activity history, you see my name as the Completed By because I am the owner of the workflow.

Any way around that?

A
Gustaf “Eat more herring” Westerlund has the floor:

Hmm… synchronous workflows can be set to execute as the user who initiated the event. [speculations about performance removed – t.j.]. Creating a custom workflow activity which closes it with the user of the last modified, might be an option.

1000 words

Workflow ownership

Tip #501: Should you use the lead entity?

In Dynamics CRM, the Lead entity is designed for potential clients that are qualified by a salesperson prior to becoming Accounts, Contacts, and Opportunities. Once qualified, CRM creates Accounts, Contacts, or Opportunities. After the salesperson speaks with the potential client, if there is no interest, the lead is “disqualified,” which deactivates the lead record.

When used in this manner, the lead entity can be useful. However, it can cause some issues if it is not used properly.

  1. Leads are like perishable products or smelly fish at the grocery store—they should not get old. The longer a lead sits in the lead entity, the more likely it will be that data issues will arise.
  2. When a lead is “qualified,” it is deactivated and most of the data is moved to a contact and account. However, not all data is moved. For example, notes associated with the lead are not moved to the contact. You can use plugins to move the missing pieces, but it is incomplete by default.
  3. There is no sure-fire foolproof way to do duplicate detection between leads and contacts. This makes it highly likely that a lead might get created for an existing contact, duplicating the identity of the person in CRM.
  4. When you disqualify a lead in CRM, the lead record is deactivated. If that person calls back in 6 months with renewed interest, most likely the salesperson will be unaware of the old lead and not know the previous interactions with that potential client.
  5. When you qualify a lead in CRM 2013/2015, you are forced to create a contact and an opportunity. Not all CRM users want to always create an opportunity and a contact. See http://www.pedroinnecco.com/2013/10/lead-entity-2013/.

For these reasons, many companies elect to not use the lead entity for prospect management. One common alternative is to use accounts and contacts for prospects and leads. Using the “relationship type” field you can define a type of “suspect” and “prospect,” and flag prospective customers appropriately. Once this is in place, views can be configured so that leads are excluded from the customer views. The benefits of this approach:

  • Better duplicate detection
  • No loss of data when converting leads
  • Marketing lists can include both leads and customers
  • More flexibility over when opportunities and contacts get created.

So who should use leads?

Based on the points above you may think that I am anti-lead. I do see several types of deployments where leads are favorable.

  • Environments with web form integrations that get many submissions with “Santa Claus” or “Mickey Mouse.” In these cases, the lead bucket may make sense to avoid introducing invalid contact data into your contact entity.
  • Environments that import heavily from trade shows or other high-junk information sources.
  • Organizations that have an individual or people that call potential clients only for the purpose of qualifying them (thanks Donna Edwards).

One more thing: Cross Entity Process Flow

The introduction of cross entity process flow in CRM 2013 does potentially alleviate some of the potential risk of using leads. This allows a user to see the qualified lead and the opportunity in the same process flow, making it more of a unified process. However, this does not take away the issues with leads and other data not converting, it just makes it easier for users to navigate between the qualified lead and the opportunity. http://canada.hitachi-solutions.com/blog/dynamics-crm-cross-entity-business-process-flow/

Tip #500: Captain Redlaces’ Mobile Manifesto

500th cakeWhat would be the better way to celebrate our 500th tip than to welcome Scott “Captain Redlaces” Sewell as our residential tipster? He opens strongly, not with just a tip but a manifesto.

Dynamics CRM App for Mobile (phone/tablet) October 2015 edition

Mobile Manifesto

The mobile apps are great.

There’s a lot to like about them – That said, translating the CRM experience to a Mobile application results in some design compromises due to the difference in form-factor and size/capacity of the devices.  Additionally the Dynamics CRM App for Mobile is a fairly young feature and I expect the feature set/design to rapidly evolve with the platform and with the capabilities of mobile devices.

This list is just a point-in-time as of October 2015, and many of these items are already in the pipeline for fixing or enhancements in the 2016 version or soon thereafter. –

For several I’m including a link to other Tips with more explanation and some workarounds – And for some I’m linking to the Microsoft Connect page where you can ‘vote’ and comment on the issue to help raise awareness of it within the product team. – (If you’re not already registered for Connect, it’s free, easy, and gives you a voice in shaping the direction of the product.)

Critical:

  1.  Filtered lookups do not work on the tablet. See Tip #274 (See and vote on this Connect item – Support Filtered Lookups for Mobile Apps (iOS/Win) )
  2. The ‘default’ view in an associated view is not the Associated View like it is in CRM – it’s the entity default – leading to confusion between the clients. (See and vote on this connect item – Associated records are displayed with the ‘Associated’ view in the web and the entity default view on the Mobile clients. (iOS/Win) )
  3. Subgrids default to the nearly universally incorrect ‘Add-Existing’ behavior – this is different than the Web client. – Additionally, the Add-Existing option can’t be removed in the tablet (like it can in the web client) (This is anticipated in the next release.)
  4. We need the long awaited web resources (e.g. CRM Posts, Yammer, LinkedIn, etc.) to work. (The first release of this is anticipated in the 2016 app.)
  5. Personal views “shared” to an individual are not visible on a Tablet – (Personal views shared to a Team are displayed, so share any personal view you want visible on the tablet/phone to a team instead of an individual.) (See and vote on this Connect item: Views shared to an individual are not available on the Mobile Client (iOS / Win)
  6. Any field configured as “Multiple Lines of Text” (e.g. the message body of emails or appointments or the “Description” field on Accounts, Contacts, Opportunities, and Cases) is only partially visible on the tablet and the user’s experience when reading /editing the text is extremely limited. (See and vote on this connect item: Expand the multiple-lines-of-text field’s read/edit window on Tablet Application and fix the word-wrap)
  7. Appointments created in the iOS App get a status of “Open” and are editable in the App and the web – however, appointments created from the Web or Outlook clients get assigned a status of “Scheduled” and are non-editable in the tablet, but are editable in the Web Client. See Tip #491 (See and vote on this connect item: Appointments Created in Web or Outlook are Read-Only in the Mobile Applications. (Status = “Scheduled”) )

Important

  1. The ‘Name’ field is required and prominently displayed in views on dashboards/subgrids (even when it’s not the most important/relevant field to show) – As a configuration, you need to plan for the ‘name’ field as if it’s the ‘headline’ for the entity to allow a user to determine at-a-glance what the record represents. – See Tip #495
  2. The default dashboard currently defaults to ‘Sales’ regardless of the default in CRM – and the sales dashboard cannot be restricted/hidden without throwing errors in the Mobile App. (This a known issue and we’ll see a fix in an upcoming release, but until then just work with this knowing that you have a single default dashboard and you can configure it to be ‘generic’ and try to make it appropriate for all users as a general first dashboard.)
  3. Navigation sections are not configurable/manageable – the sitemap is displayed in a seemingly random order. (I think there is a fix in the works for this.)
  4. The field layout is inconsistent with the web-app resulting in a jumbled order of fields – (Rather than a using Sections with multiple columns, use Tabs of Multiple Columns containing multiple single-column sections.) See Tip #497 for an explanation/workaround
  5. Tweaks to the ChartXML work fine in the Web Client, but do not render in the Mobile client (e.g. applying a custom label / interval.)
  6. Configuring the sitemap to display/hide some elements based on permissions works in the Web client, but it is not honored in the Mobile app. See Tip #466
  7. The form used on the Mobile Client is just a render of the user’s main form – it’s not a ‘special’ mobile-oriented form. – This allows you to “configure once” – but leads to compromises since some entities only need a bit of summary information pushed to the mobile devices – but need a much richer layout in a form consumed on a web page.
  8. There is a current bug that throws an error whenever you attempt to ‘sort’ in a mobile grid by tapping on the column heading – IF you have 2 columns defined as the default sort order that view. See Tip #441 (There is a fix in the works, but if you really run into problem with users throwing an error when they search, just remove one of the two sort-columns until a fix is available.)
  9. Lookups only search against the ‘name’ of the entity – despite the quick-find configuration and the behavior in the web client. – See the Bonus Tip added to Tip #274 – Additionally the asterisk ( * ) wildcard is not supported on the Tablet, but rather the tablet uses the SQL standard percent sign ( % ) as a wildcard. (See and vote on this Connect item – and this one Alternative search should work in the CRM for tablets app on lookup fields search)

Annoying

  1. Custom icons are not available on the mobile client.
  2. Tiles for custom entities are all identical green squares.
  3. Charts are sized too large to fit in the panes in Dashboard and cannot be fully seen without scrolling up and down. (I believe there is a fix in the works for this)
  4. The “Case” of view names gets changed to “Titlecase” which messes up CamelCase nouns and ALLCAPS abbreviations like YTD/MTD/LTM in views. (See and vote on this Connect item – Case Sensitivity in Views displayed in iOS app (tablet) )
  5. The ‘Name’ field for each entity is required to be in the view in order to open a record from a web view on a tablet. (This is mostly a limitation since there’s no double click in Safari on the iPad. – The ‘Name’ field serves as a hyperlink to the record in Safari.) – See Tip #495
  6. “Pinning” tiles to the ‘Home’ or a dashboard view is GREAT – unfortunately that information is cached locally and does not transfer from your phone to your tablet or vice-versa – Also, if you ever log-off the device, you lose your ‘pin’ configuration for that device. (See and vote on this Connect item – Records that are pinned to the Home page do not show up when the CRM App in iPad is reconfigured )

Maddening

This is My Number one issue – If you do anything to CRM’s configuration and publish arbitrarily or with any regularity – every mobile user will (justifiably) hate you for 4-6 minutes while they update their metadata.
Any ‘publish’ at the server causes each mobile device to prompt the user to download the latest metadata – which depending on the speed of the device and connection could take 4 minutes or longer to complete during which the user can’t really use their phone.
Mitigation of impact:
1) Train users to ‘ignore’ the download prompt “if they’re busy” – (This approach could easily train users to /always/ ignore the prompt and wind up with significantly outdated metadata.)
2) Limit the updates to CRM to only once-a-month or once-a-quarter. – (This is a best practice, but requires a disciplined approach to the process of deploying / updating CRM.)