 of the
When you use loops like ForAll function in a low-code plug-in, ThisRecord will change its meaning from the table row associated with the plug-in run, to the row inside the loop. Disambiguating is fairly straightforward… once you know how.
Tip #1459: How to bypass Dataverse plug-ins and flows in Power Automate actions
When you need to insert, update, or delete a large number of records in Dataverse, synchronous plug-ins can get in the way. Asynchronous plug-ins and Power Automate flows are triggered independently (out of process) but can be overwhelming for the system and can be throttled down. Did you know you can bypass either? Did you know you can do it in Power Automate?
Continue readingTip #1458: How to copy files between Dataverse tables
No names in this story have been changed to protect the innocent—or was it to protect the guilty? Or to expose the innocent? Anyway, read on.
When Megan V. Walker (her real name) asks a question, others listen because it’s often a non-trivial challenge.
I have two tables, both with a file column. I want to use Power Automate to move the file from TABLE A to the corresponding field on TABLE B.
(Easy, right? Not so fast! – g.d.)
Continue reading
Tip #1457: Format JSON for human consumption
It’s not a secret that these days, data float around in automation using the JSON format. Submit a form, get JSON back. It is not human- (or any other carbon-based life form-) friendly.
{ "First Name": "Nancy", "Last Name": "Davolio",
"Age": 42, "Influencer": true, "Customer":
"Balderdash Primary School",  "CustomerPONo":
"PO100042810",  "SalesOrderNo": "sy039978" }
My fellow Power Automate Gymnast, Amey “CI-J” Holden, asked if a code-only connector can be created to help produce nicely formatted emails containing form submission results. And it occurred to me that the JSON Extractor CoC can be used to accomplish the task in three steps:
Continue readingTip #1456: Enumerate and extract JSON object properties
tl;dr
Use Extract JSON code only connector to select only a subset of object properties matching specified regular expression.
Continue readingTip #1455: Experiment with parallel branches
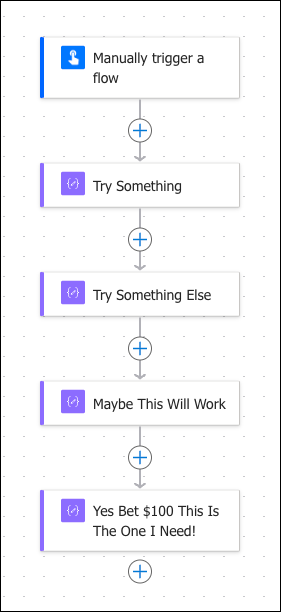
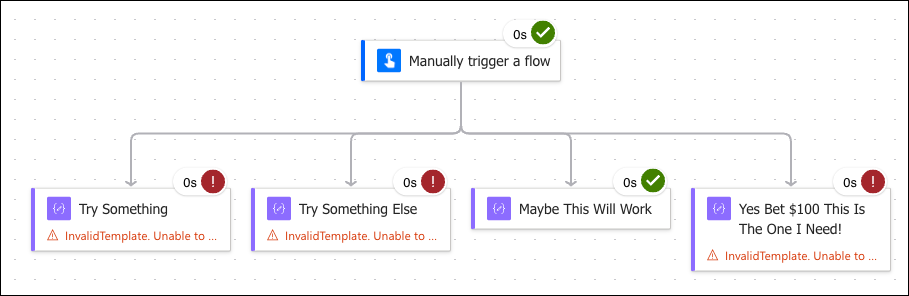
While experimenting in a flow trying to find that elusive expression or action, I often catch myself doing this:
The problem is, of course, I don’t bother setting Run After conditions and the result often looks like this:
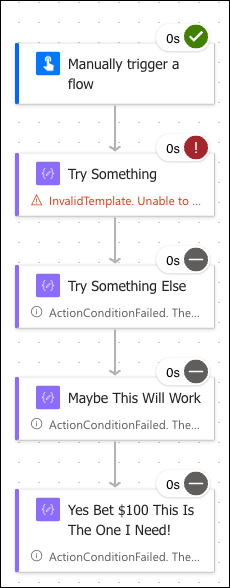
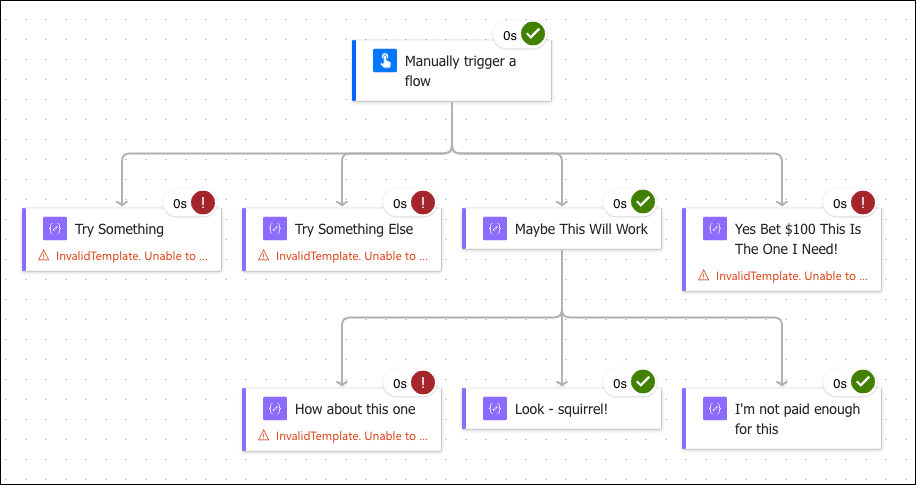
Now I have to edit, figure out what’s wrong, run again and again as I didn’t get to even try three other steps. If you find yourself doing the same mind-numbing experimental activities, make it a habit to use parallel branches!
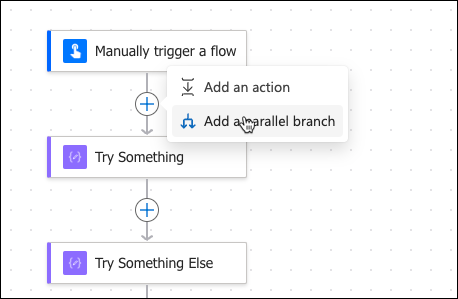
Add a parallel branch or two and rearrange the existing flow.
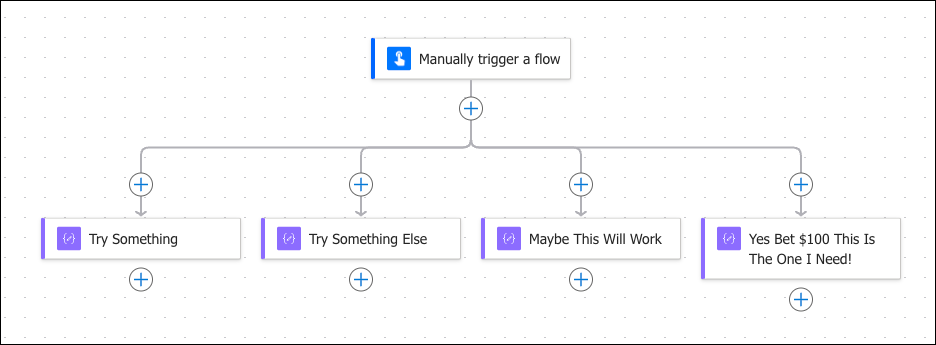
The execution nails one of the actions as a solution in a single run!
You can continue branching out, of course, on any level:
PS. Credit where credit’s due: juggling parallel branches is much easier in the new Power Automate editor.
PPS. Use parallel branches for production runs as well. Don’t tell anyone but executing things in parallel is usually faster.
Tip #1454: Azure Blob metadata and index tags in Power Automate
tl;dr
Access Azure blob metadata in two steps: obtain a SAS URI, then make an HTTP request — HEAD to read or PUT to write. Accessing index tags isn’t straightforward; secure a SAS URI that permits tag manipulation elsewhere, then return to complete the task.
Continue readingTip #1453: Open the tools like a pro
Today’s tip is from Eric Regnier. (Have a tip of your own? Send it to jar@crmtipoftheday.com)
Ever wondered if you had the latest and greatest version of the Plugin Registration Tool (PRT) or Configuration Migration Tool (CMT)? And always had to Google Bing Copilot it to find and download the tool? You can now just pac it!
From any console like VS Code or PowerShell, just type pac tool prt for PRT and pac tool cmt for CMT.
You can also launch Power Platform Admin Center (PPAC) and the Marker portal from pac, run pac tool admin and pac tool maker, respectively.
For more info on pac CLI and how to install it: https://learn.microsoft.com/power-platform/developer/cli/introduction. Happy Power Platforming!
Tîpp Jäår $0.02 + GST

Tip #1452: Compare dates in Power Automate
tl;dr
Always use formatDateTime(), substring(), convertFromUtc(), convertTimeZone() to drop the time part and ensure the dates are in the same timezone.
!tl;dr
The datetime isn’t of any special type in Power Automate; it’s just a string representation of a timestamp in an ISO format. Yes, the format is sortable, so in theory, you could compare just the values. However, if you have a date input parameter in your flow, it comes as a date without any time part, so you might miss that birthday when comparing it to utcNow()!
To further complicate matters, datetime values include both the time portion and a timezone indicator. What is today for you can be yesterday or tomorrow for other people. Time difference can be up to 25 hours (don’t get me started on that Samoa vs American Samoa trip again). And do you really want to compare seconds if you’re after just the date?
Life becomes much easier if you follow two rules:
- Bring timestamps into the same timezone.
- Extract and compare just the date portion.
The following functions come to the rescue (yes, I am aware there are actions doing the same thing).
formatDateTime(date, 'yyyy-MM-dd')– just the date portionsubstring(datetime, 0, 10)– just the date portionconvertFromUtc(datetime, 'Samoa Standard Time‘, ‘yyyy-MM-dd’)– if your user in +13 timezoneconvertTimeZone(datetime, 'UTC-11', 'Samoa Standard Time', 'yyyy-MM-dd')– convert American Samoa date prior to comparing to the date in Samoa (be very surprised)
Timezones always do my head in (would it be so hard to make them an enumeration?!). Here’s the current list: Default Time Zones | Microsoft Learn. Perhaps I should create a Code only Connector (CoC) for it, so I don’t have to remember the list?
Tip #1451: Aggregates in Power Automate
There is no easy way to calculate aggregates in Power Automate (except count, of course, which technically, is an aggregate). You do have a few options available to you: loop over the array and apply hideous formulas forgotten since the statistics/SQL course, use Graph API and bring magic of Excel formulas, use third-party connectors (which is not a bad option if you already paying for them). If your data coming from Dataverse you can use FetchXml. SharePoint data can be wrestled with CAML aggregations (yes, it’s a real thing). You can probably even cook some joujou with xml transforms.
Enter Code-Only Connectors (CoC). For a walkthrough watch Hour 16 “Mastering Custom Code in Power Platform Connectors” at Power Platform 24 Conference (double speed recommended, my speech patterns can be painfully slow after excessive travel). Here’s some magic we can do with just code by using Aggregate and CSV To JSON CoCs.
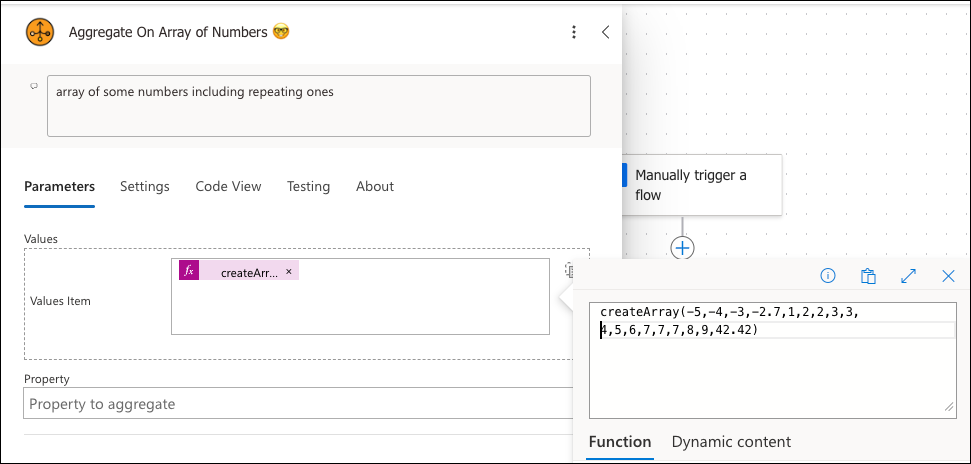
Aggregate array of numbers
Input is an array of primitive values that can presumably be converted to numbers.
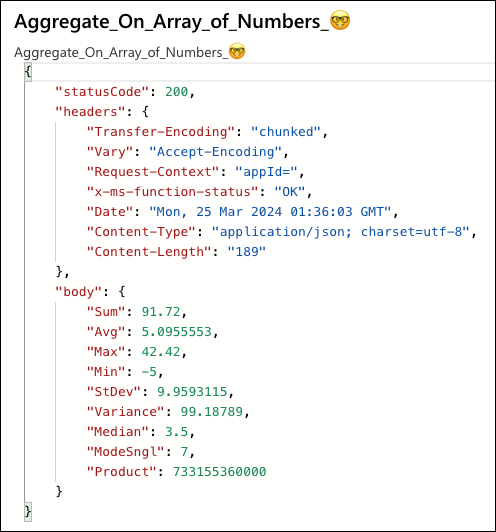
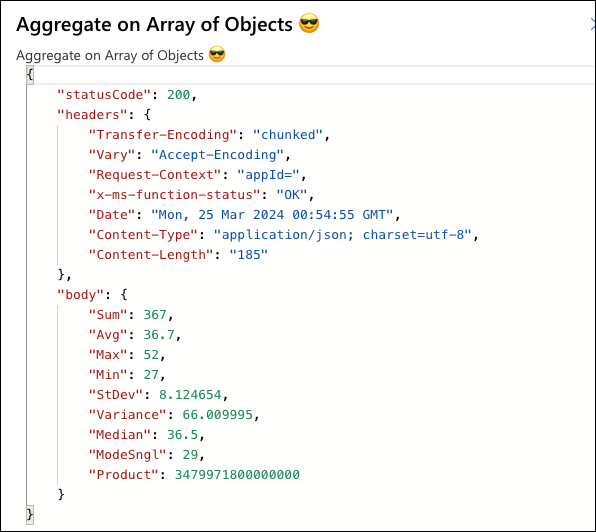
Output is a set of Excel-like aggregate functions: Sum, Avg, StDev, Median, Min, Max, Product and a bonus ModeSngl (the most frequent value in the sequence).
Wait, there is more!
Aggregate array of objects
When you have an array of objects and need some aggregates on a property, it’s an extra effort to extract the array holding just those numeric values. Our connector can take an array of objects, all you need to do is to tell it which property to aggregate.
This example uses sample CSV data containing some contact information including the age. The first action is a simple CSV set.

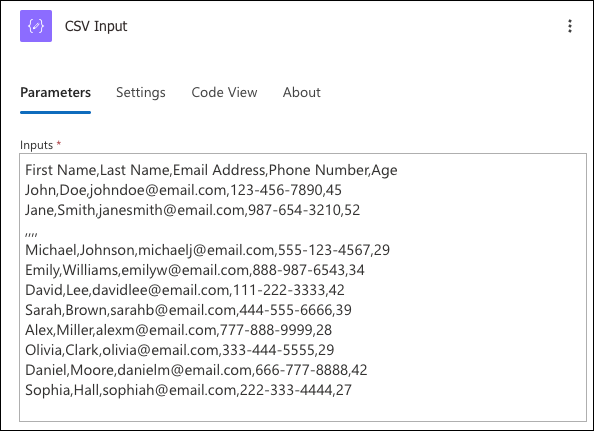
Second action takes that CSV and converts it to JSON:

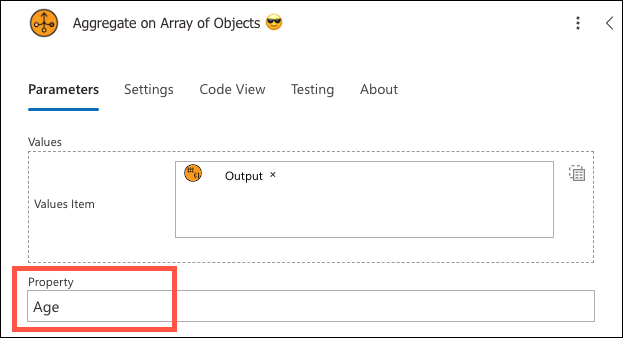
And the last step brings it home by taking the JSON object ‘as is’ and calculating aggregates on the ‘Age’ property.
There are plenty of plans to add other Code Only Connectors (CoCs). There are some decisions to be made: how to compose a single connector with all methods included, how to validate syntax, is it possible to create a test harness, shall we publish these as independent custom connectors or just leave it like that?
Want to get involved? Drop email to jar@crmtipoftheday.com and/or go straight to the source https://github.com/georged/code-connectors.