 of the
¡Como estas amigos! Our good friend Pablo “CRMGamified” Peralta with another bunch of tips for dummies the rest of us. If your Español is good, read the original, nothing to see here. Otherwise, read Part 1 and enjoy the rest.
How to Set It Up
Requirements
- This feature is only available on CRM 2015 Online (with Update 1) at the moment I’m writing this. Unfortunately, it’s still not available for On-premises CRM 2015.
- SharePoint integration must be already set up on the server.
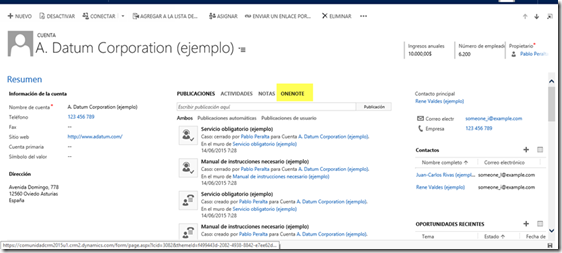
- The entity you want to integrate with OneNote (i.e. Account, Opportunity) must have SharePoint integration enabled.
- After enabling the previous integration for the entity, you also need to enable OneNote integration to actually see the “OneNote” tab on the record and access the OneNote Notebook.
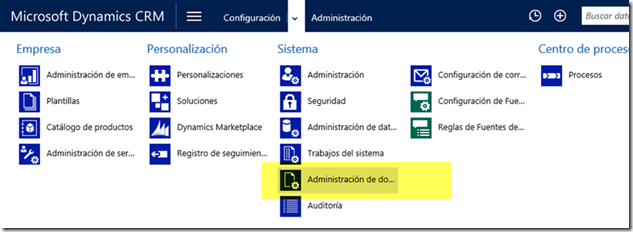
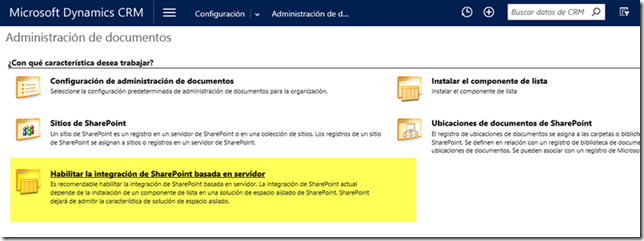
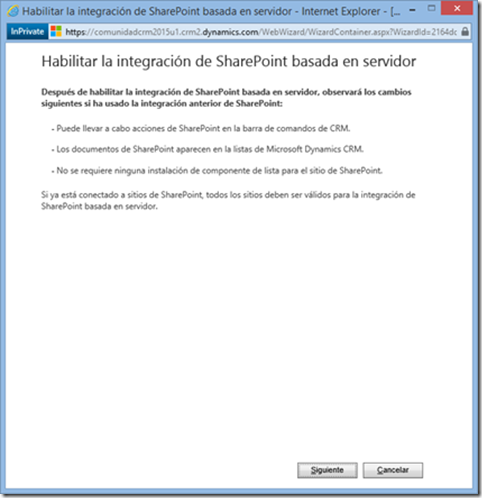
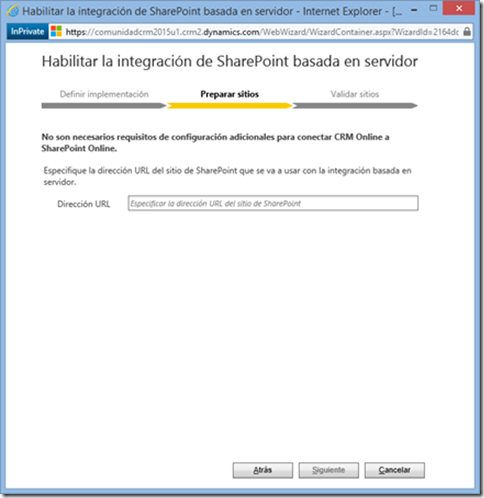
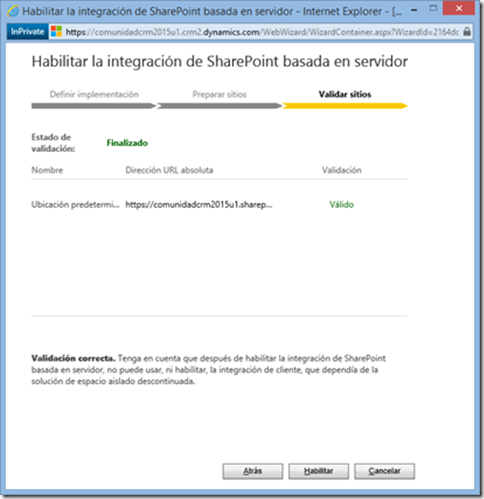
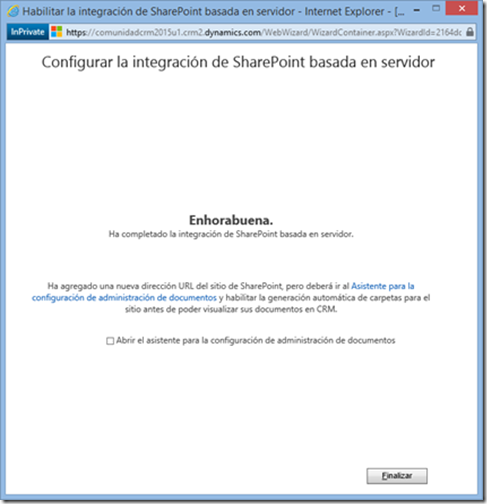
Step 1: Enable SharePoint Online Integration (Server Set Up)
- Settings > Manage Documents
- Enable server-based SharePoint integration
- Follow set up instructions:
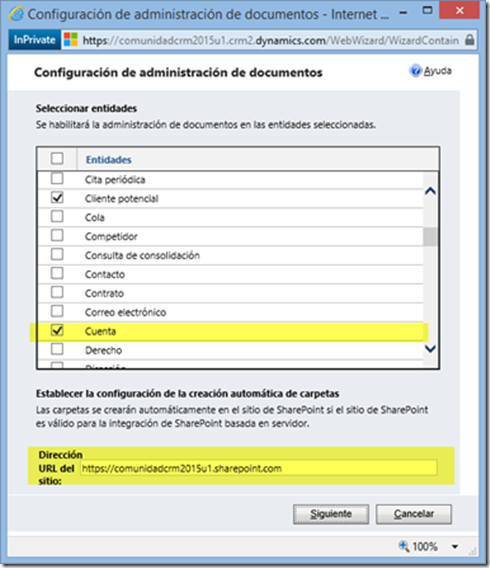
Step 2: Enable Entity for SharePoint Integration
- Settings > Manage Documents > Manage Documents Settings
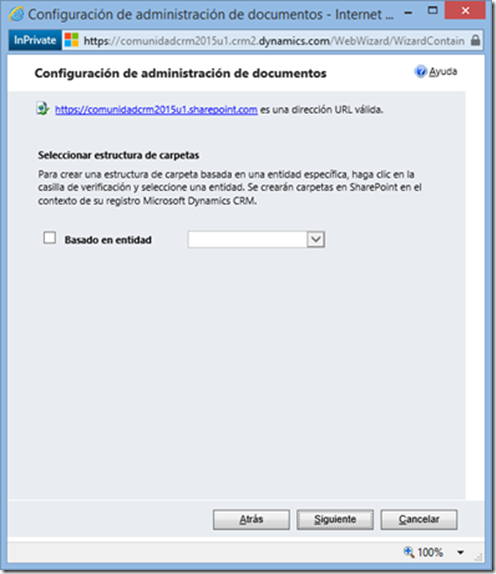
- Select the entities to enable and enter the URL of your SharePoint document storage site.
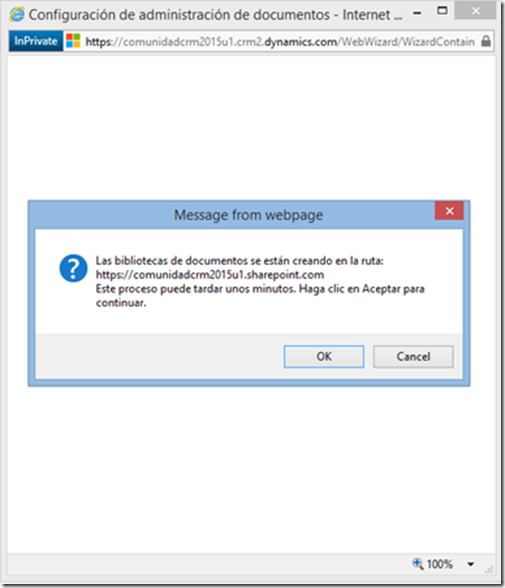
- The system now asks us if we wish to set our folder structure around any entity (not recommended, in my experience):
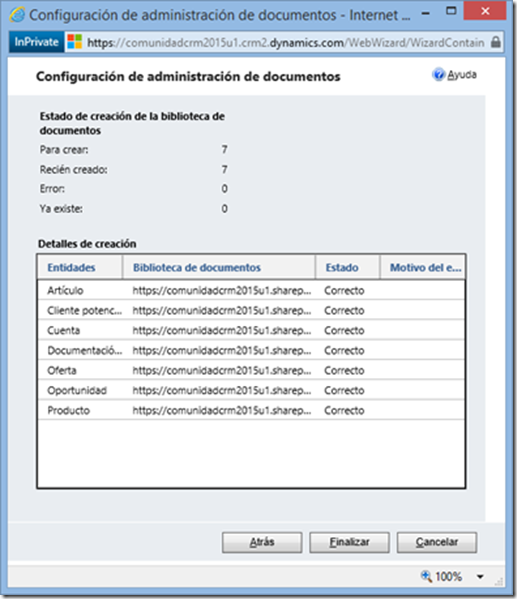
- Confirm that you wish to create document libraries:
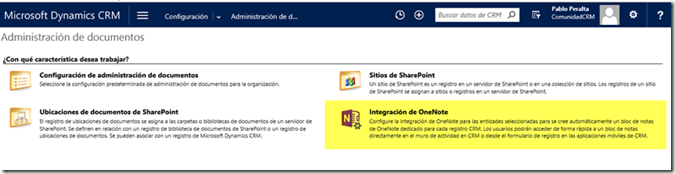
Step 3: Enable OneNote Integration for Entity
- Settings > Manage Documents > OneNote Integration (this option is not available until you’ve enabled SharePoint integration, such as we did in the previous step).
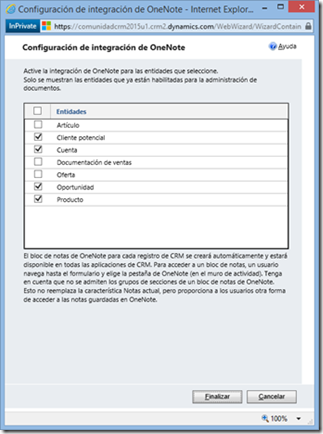
- Select which entities you wish to include OneNote notes. You’ll only get to choose from entities where SharePoint document management is enabled, such as we already did in the previous step.
- Finalize setup and check it out: you can now see a new “OneNote” tab within the panel of any of the entities you just enabled for OneNote integration.
Stay tuned for the next part where OneNote and gold old annotation a.k.a. notes go head to head.
hi, I’m getting an error while trying to access the oneNote with regular user, this error shows up ”
The remote server returned an error 401 not authorized. contact the admin (Error: 0x800608b4)” (I translated it).
but when I access it with my admin user, it works well, any permission missing?
thanks in advance.